
DIY Decorative Metal Spheres
Do you ever get in one of those moods where you wanna start a project, but not one that will take days...weeks...months to complete- just something easy, cheap, awesome and super quick.
Well then, I have just the project for you.
We've all seen 'em. In fact, some of you probably have some in your home.
They are decorative spheres.
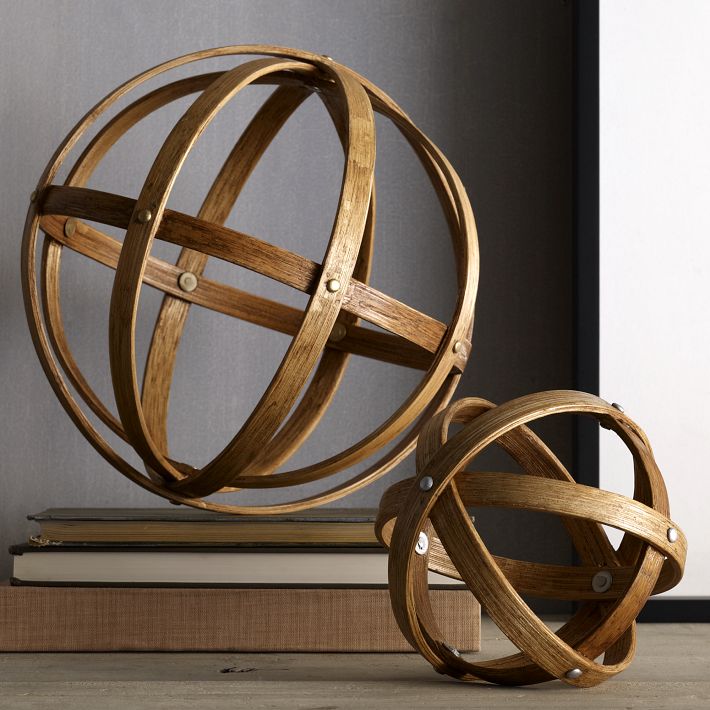 |
| westelm.com |
Decorative spheres are totally the bomb. Just think of all the awesome things that are round...the earth...the sun...gumballs.
Spheres provide great filler for bookshelves and containers, and are the perfect accessory for tables, countertops or any empty space really. Spheres help add visual interest to any decor and can also add an element of softeness to a space.
The metal spheres I'm going to show you how to make would also be a great addition to an outside garden or sitting area. Just think of the lovely, rusted patina they would develop over time.
To begin, you need to gather your supplies:
 |
| Screws and bolts {8 of each are required for one sphere. A package like the one pictured above costs about $.98} |
 |
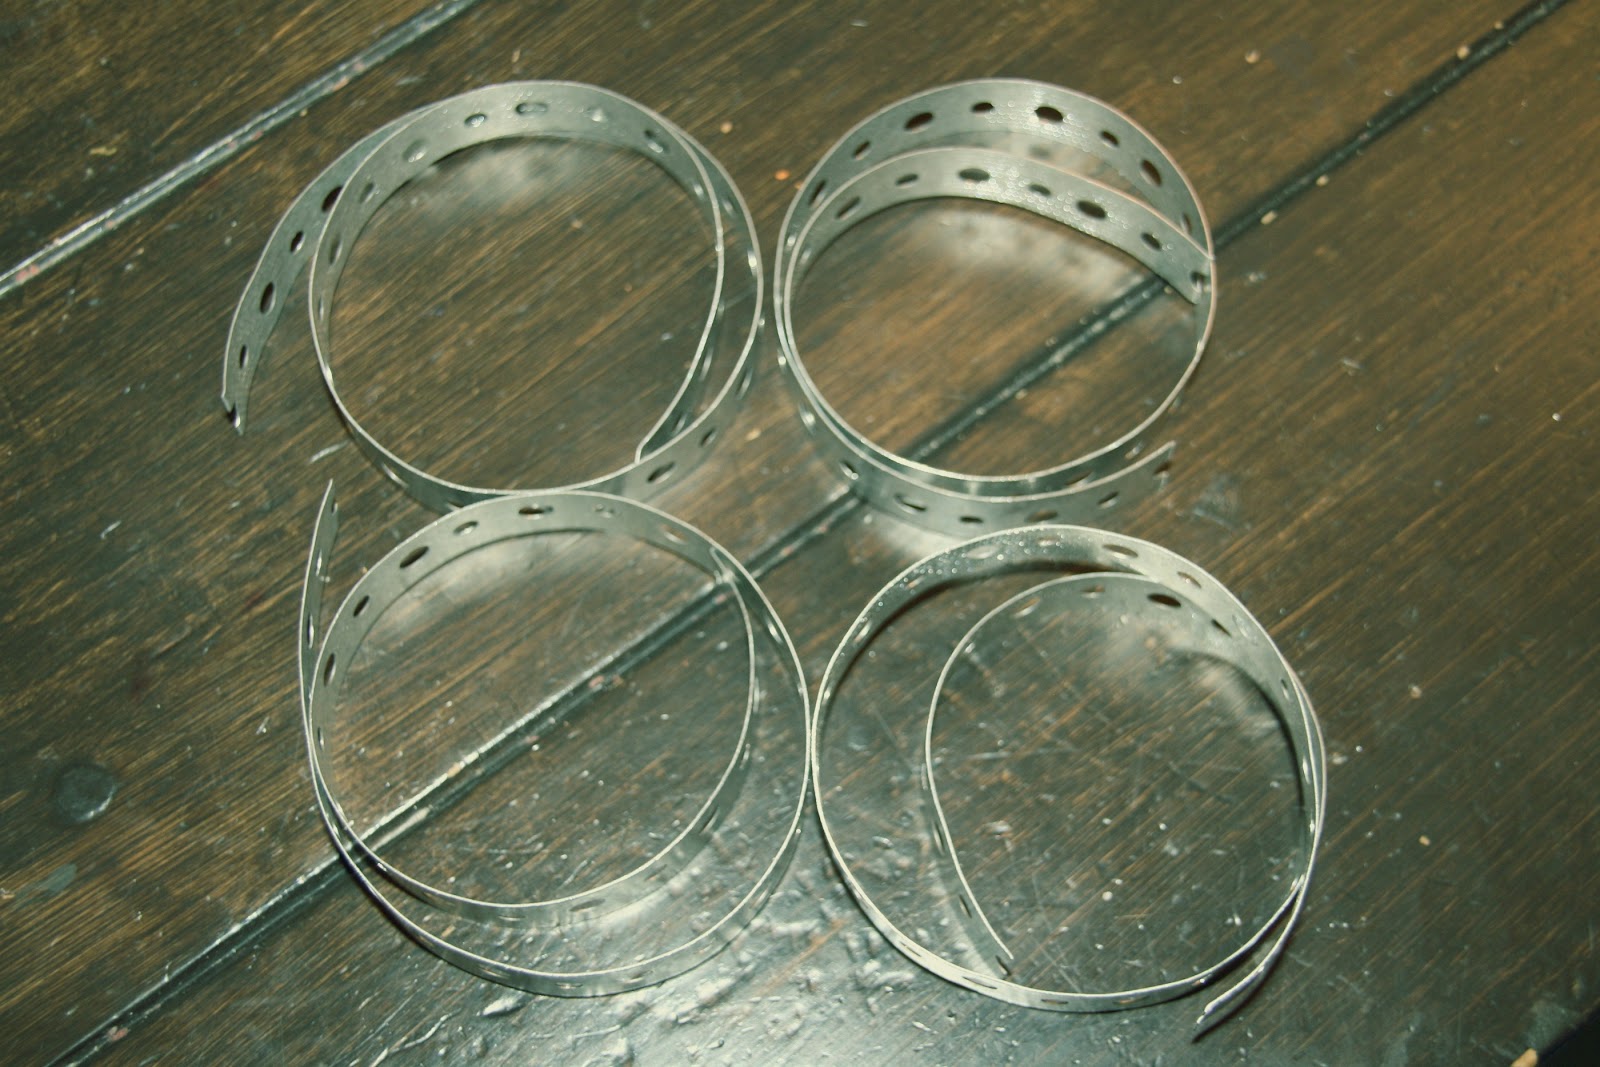
| Metal strapping {$5- available at any home improvement store} |
 |
| A round container for measuring your metal strapping {in this case a ginormous jar of peanut butter, cause that's how we roll}. |
Start by measuring your strapping. Do this by wrapping it around your circular container.
 |
| Do this four times. |
Now you can begin assembling your sphere
 |
| Start by making one hoop and securing it with a screw and nut. |
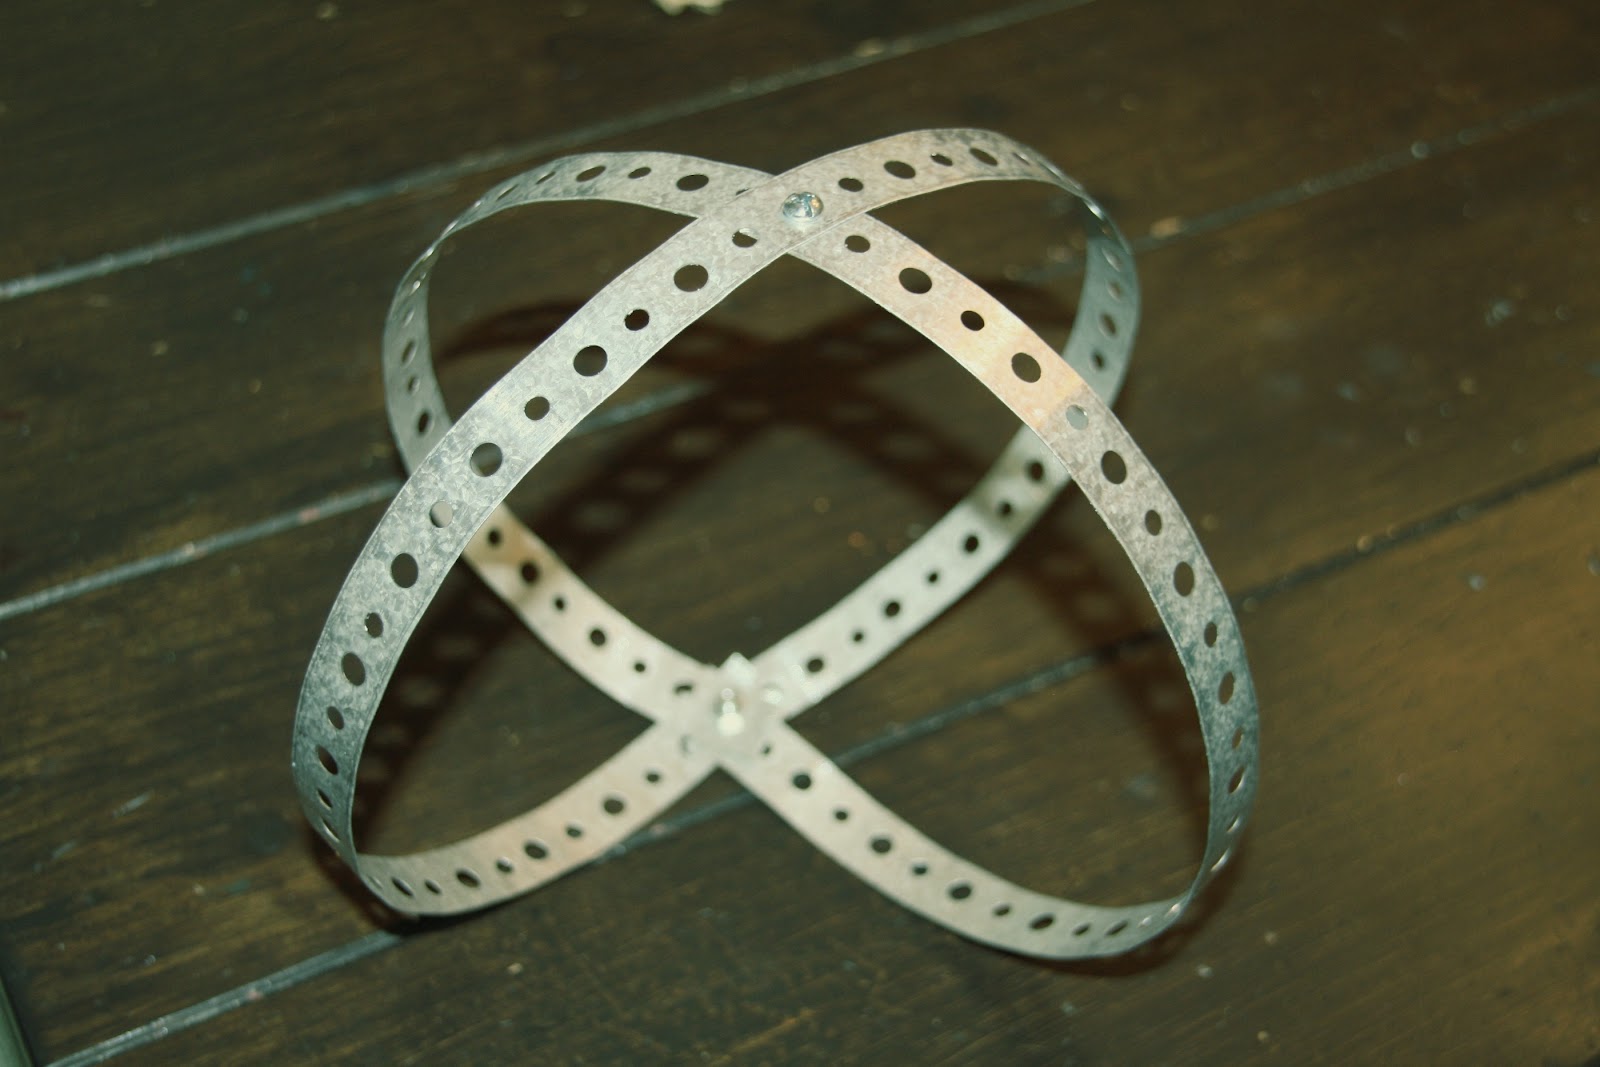 |
| Then add a second hoop and secure the top and bottom with a screw and nut. |
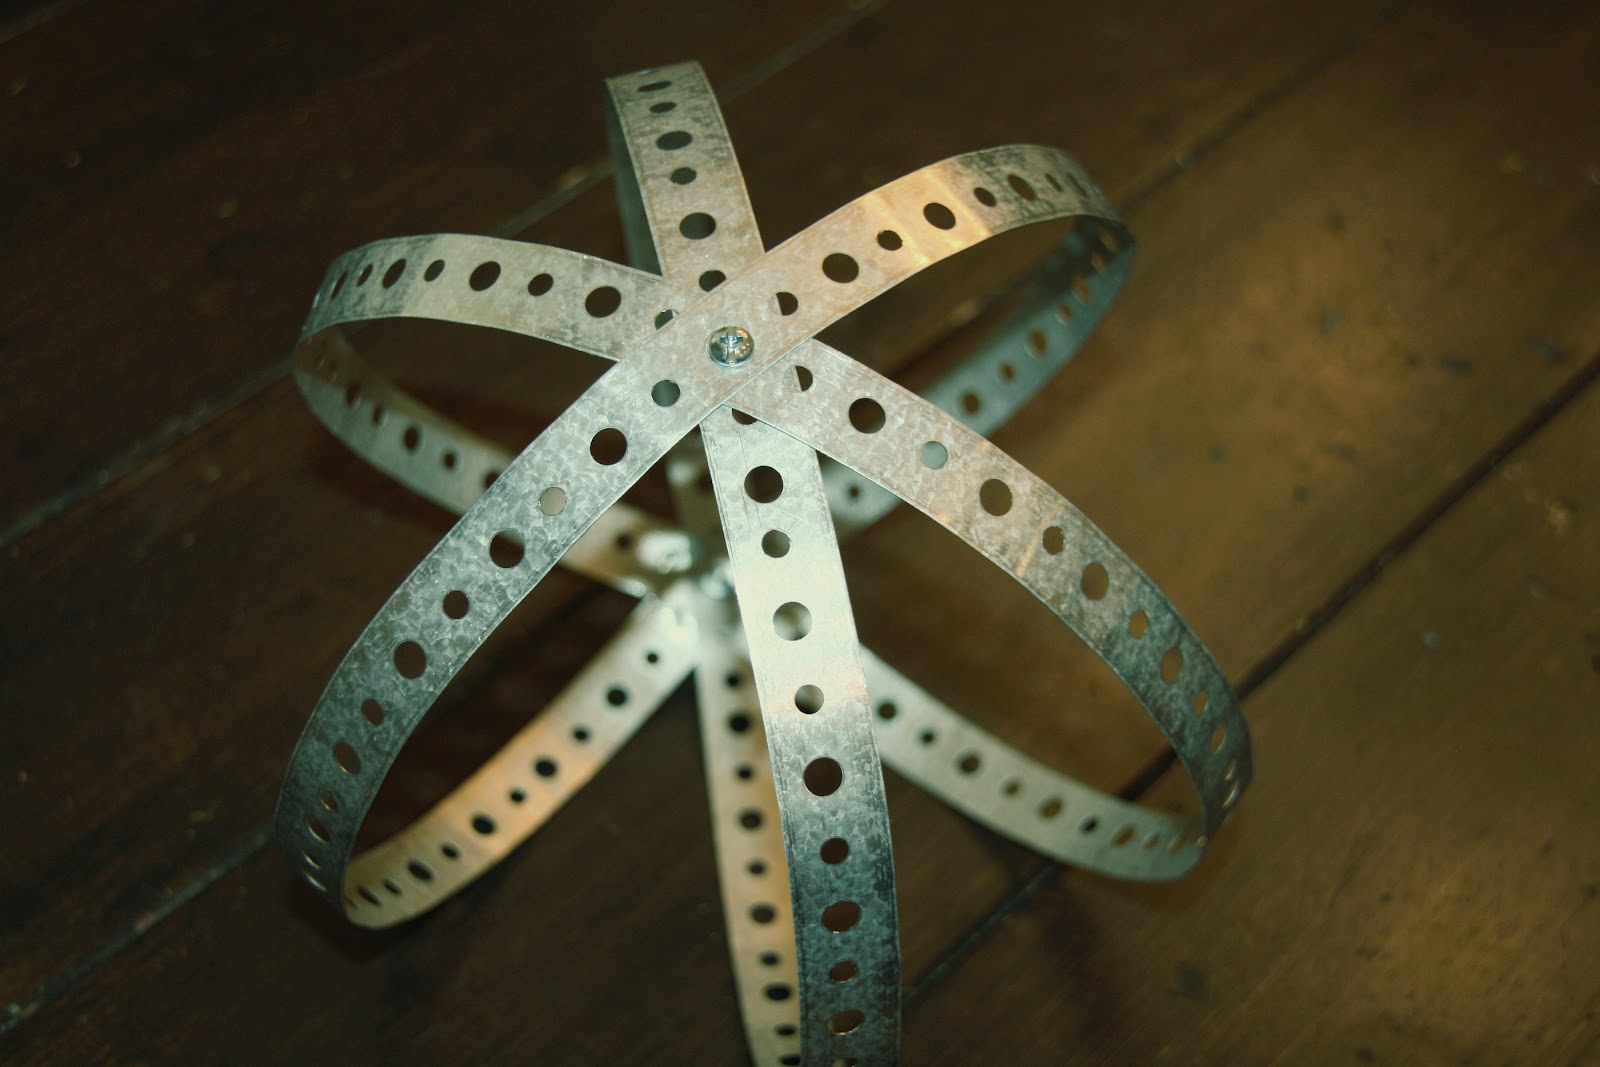 |
| Then add a third hoop and secure it at the top and bottom as well. |
 |
| Add your fourth and final hoop around the circumference of your sphere. This will stabilize and support your sphere. Be sure to add a screw and nut every where the the strapping intersects itself. And voila! That's it, you're done. This project is super quick, super easy and super cheap. I love the cool, industrial look of these orbs. Somehow they also managed to stay classy and sophisticated. The one's I made ended up on my bookshelf.  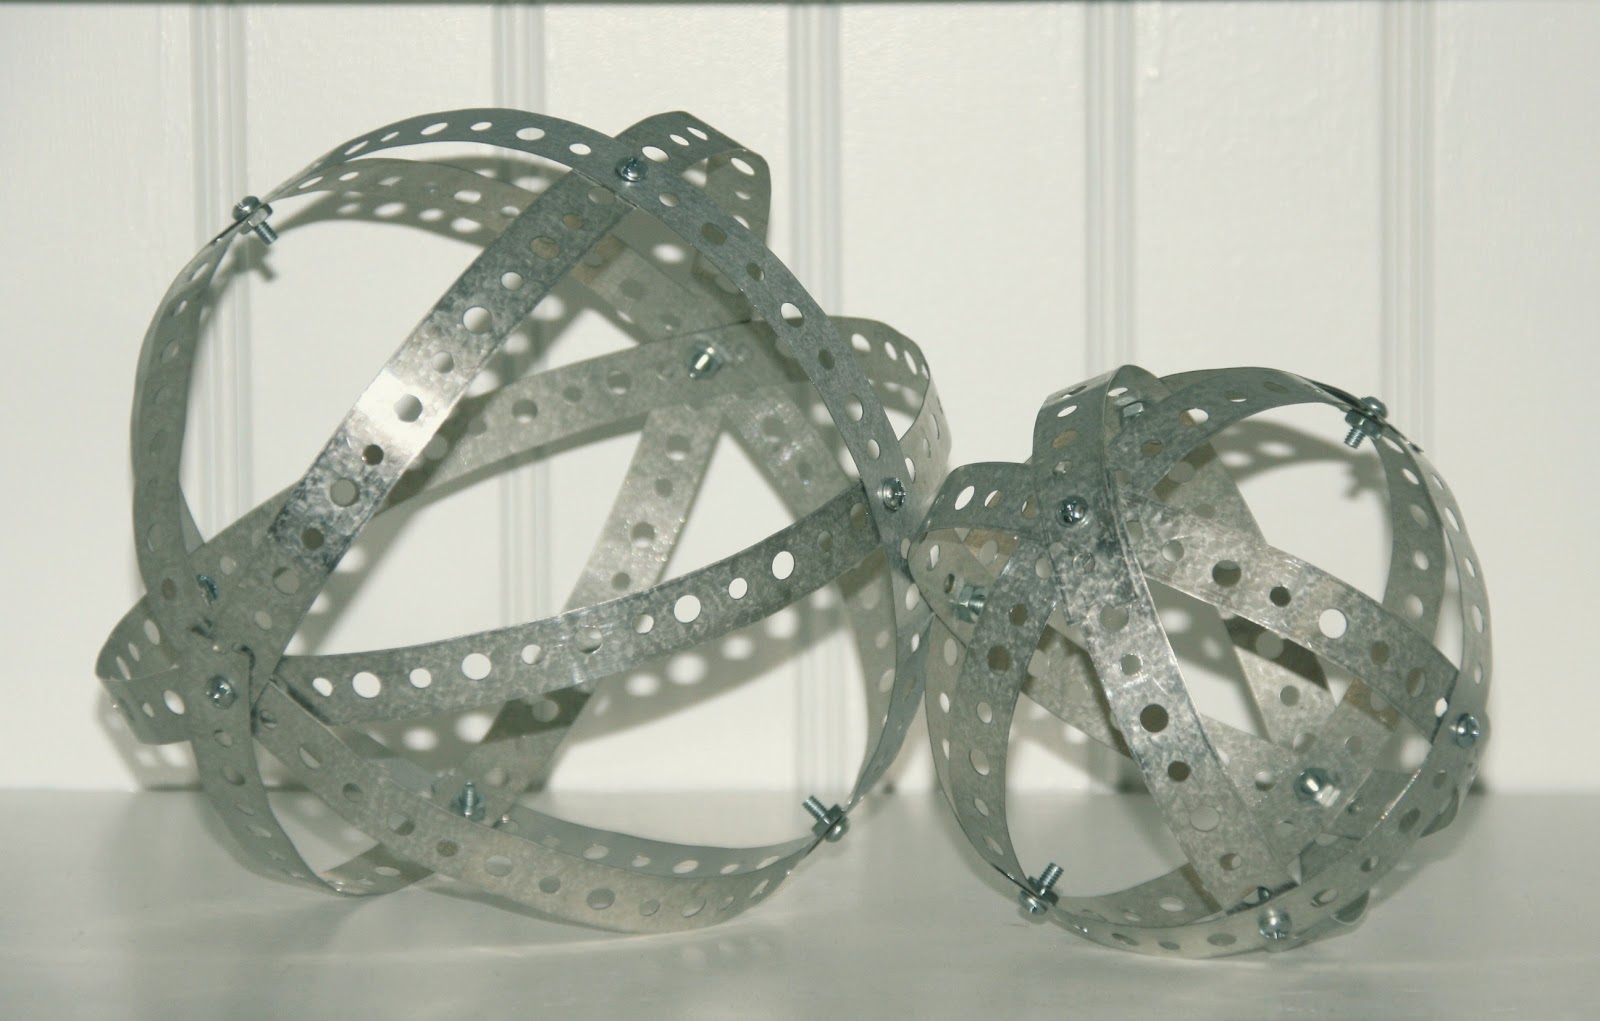  Look how awesome they could be with a rusted finish. 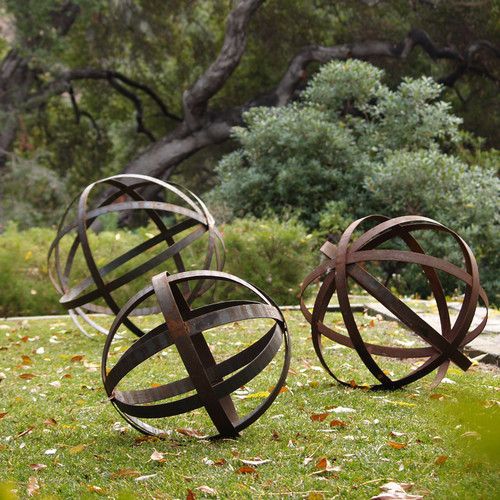 These powdered coated spheres are a fun variation. Something like this would look fabulous on a deck or patio table. |

Now I am thinking of making one ginormous orb and turning it into a ceiling light. Something along the lines of this:

I really love the look of wood, so naturally I had to try out a wooden version too. I made these out of wooden embroidery hoops and thumb tacks.
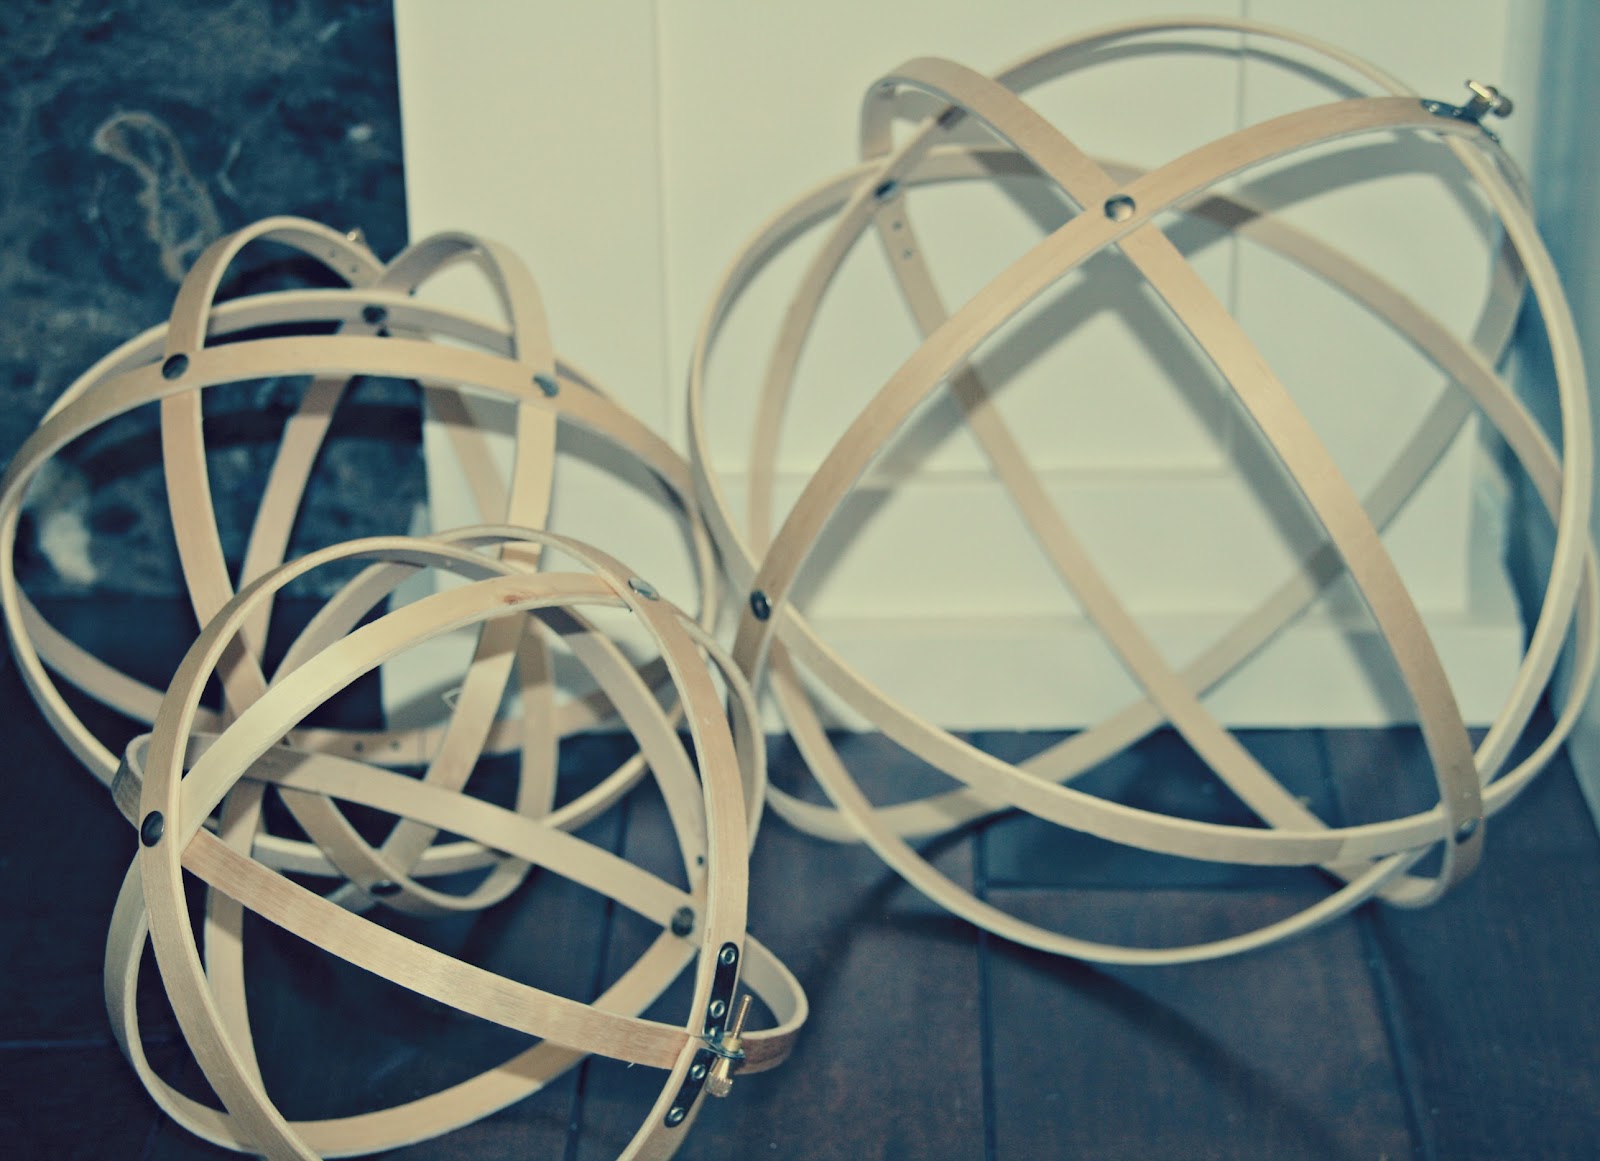 |
| These spheres are 8, 9 and 12 inches in diameter. |
When it was all said and done, I ended up spending about $2 for each metal sphere. I was able to make 3, 4in. diameter spheres and 1, 7in. diameter sphere out of one $5 package of metal strapping. The wooden spheres cost about $3 a piece {each sphere took two embroidery hoops at $1.50 each}. I'm not sure how much something like these would cost retail, but I'm pretty sure you couldn't get them for $2 or $3.

DIY Zinc/Industrial Metal Letters
Anybody remember seeing these beauties at Anthropolgie awhile back?

I really like the urban punch these industrial letters give. They are super versatile and look great in any room and in any decor.
As I was nearing completion on my latest project, my laundry/mud room revamp...I thought some of these lovelies would be the perfect accessory for personalizing some hooks I hung.
Always the sucker for knocking off anything I think is over priced, I set out to recreate these preciouses for as little as possible.
I started out with a regular, old paper mache letter {or number or whatever tickles your fancy}. You can get them at any craft store {$2-4.50, depending on what size you choose}.


I grabbed some black and some metallic silver craft paint. {$2-3 each}


and some silver brads {$3 for 50}


Bam! That's all you need to create some industrial chic goodness.
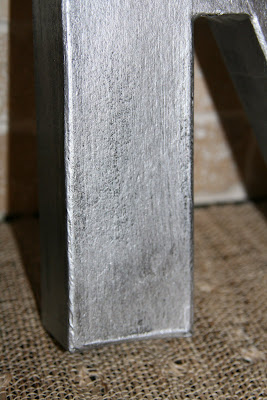
To begin, paint the letter {or number} black
After it is dry, lightly brush over it with the metallic paint.

You want to take care not to put the paint on too thickly. The goal is to allow some of the black base coat to show through.
After this coat of paint is dry, apply one more coat of metallic paint. Again, brushing very lightly. Most of the black should be covered up with the silver paint at this point. But, you should still be able to see some of the black peeking through- giving the letter more depth and the zinc look we are going for.

Now, you could stop here and call it good, or you could add a little industrial bling by applying strategically placed silver brads all over the letter.

Poke a little pilot hole with a sharp utensil of your choosing...I used a little paring knife.


After it is dry, lightly brush over it with the metallic paint.

You want to take care not to put the paint on too thickly. The goal is to allow some of the black base coat to show through.
After this coat of paint is dry, apply one more coat of metallic paint. Again, brushing very lightly. Most of the black should be covered up with the silver paint at this point. But, you should still be able to see some of the black peeking through- giving the letter more depth and the zinc look we are going for.


Now, you could stop here and call it good, or you could add a little industrial bling by applying strategically placed silver brads all over the letter.

Poke a little pilot hole with a sharp utensil of your choosing...I used a little paring knife.

Once you have the hole made, add a little hot glue to the prongs of your brad and insert into the hole.
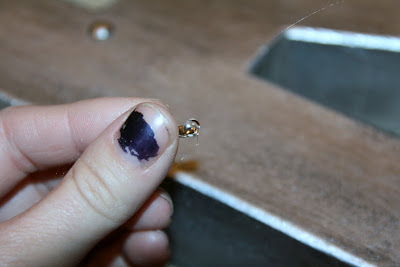

{I brushed over all of the brads with some left over paint to tone down the shine and help them blend in with the letter more...not necessary, but I think it looks better personally}.


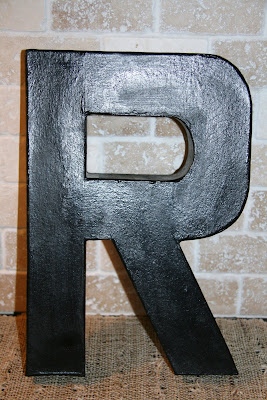
And voila. Paper mache letters that look just like industrial metal letters.

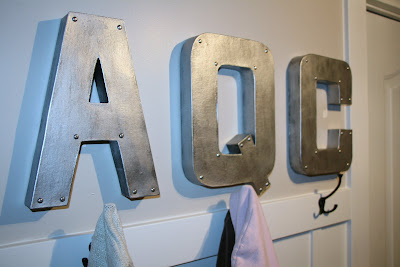


And voila. Paper mache letters that look just like industrial metal letters.
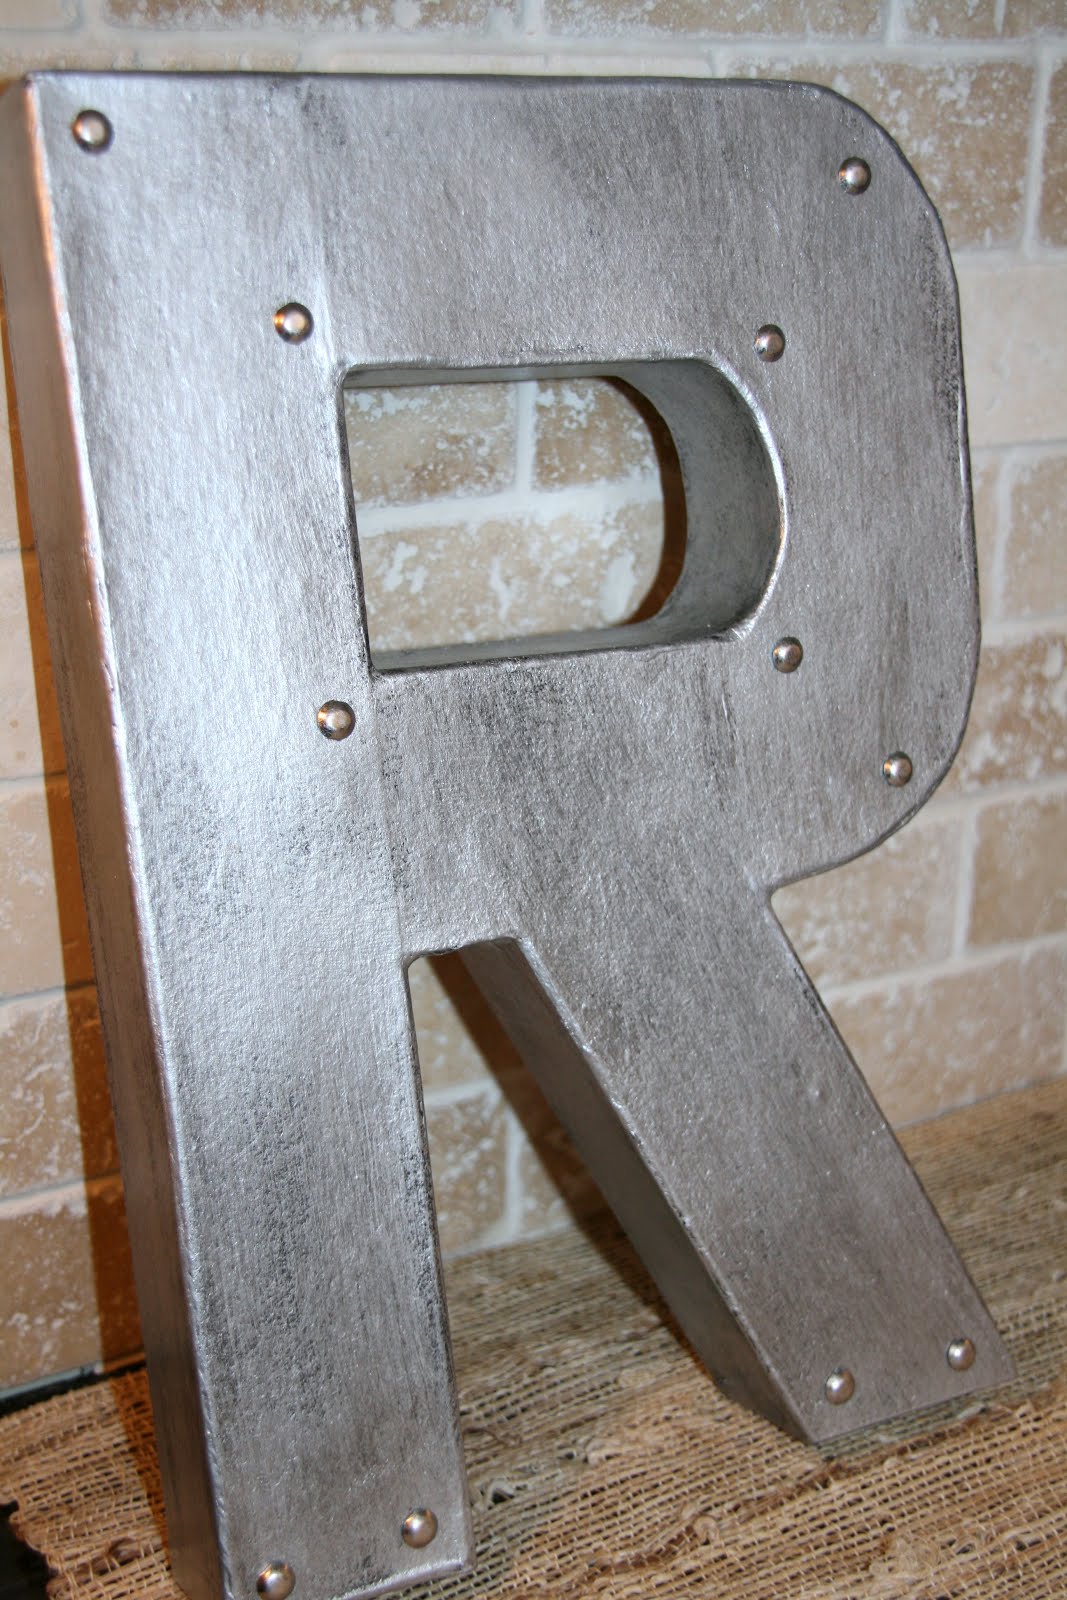

I ended up spending about $30 for five, 12 inch letters. The zinc letters at Anthropologie, were smaller and sold for around $18 each. That's a savings of almost $70. Boo-ya!!!
{Also, my little tip for hanging the dears...use adhesive velcro cut into little squares on the back. The letters will stay nice and secure on the wall. This also makes it easy to take down and put the letters back up should you ever need to.}
DIY-Aged Wood Bench Knock Off
I woke in a Bob Villa sorta mood today and had a hankerin' to build something. I thought about it for a little while, and after throwing around a couple of ideas, I finally settled on this:

You might remember this cute little thing from an earlier post. It's an "aged wood bench" from World Market and retails for $149. When I saw the price it felt like someone reached down my throat and puched my stomach from the inside.
I love this little bench. I really wanted this little bench. I have the perfect spot picked out for this little bench. But, there is no flippin' way I'm spending one hundred and fitty dollas on it...even if I love it almost as much as my kids.
After analyzing the picture for a while, and channeling my inner Bob, I came up with a way to recreate the look for only a couple of bucks...no seriously.
The best part...it only requires a few supplies:
* a table saw{if you don't have one, the guys at Home Depot do}
* a piece of wood {I used a leftover piece of 8x8x12 board, they retail for about $7}
* a wooden dowel{I used a cedar ballister. It cost about $2.50}
* Screws
* Wood GlueThe World Market version measures 34inches x 18inches, so I started out by cutting my board into three piecs: one at 34 inches, and two at 18 inches.
Then I dry fit my three cut pieces and measured the distance between the two legs.


Next, I found the center of each leg and measured up four inches from the bottom,


and drilled pilot holes

After that, I drilled pilot holes in the ends of my ballister and applied wood glue.

Then I screwed each of the legs to either end of the ballister.


I did the same for the top of bench. I centered the board on the legs, drilled pilot holes


applied some wood glue


then screwed it on.


When I referred back to the inspiration pic, I realized that the support dowel looked like it when through the board and protruded out the side. So, I decided to cut two, 1 1/2 inch pieces of ballister and glue them to the outsides of the legs, so that I could achieve the illusion of the wood extending all the way through the board. This wasn't a necessary step, it's purely aesthetic, but I think it adds a little somethin' somethin'. But you be the judge.

I decided to use my bench as an end table, since I didn't have one. But I think it would look super cute in the entry way, by the front door, or in a childs room. Really it would look fabulous anywhere.

I decided to use my bench as an end table, since I didn't have one. But I think it would look super cute in the entry way, by the front door, or in a childs room. Really it would look fabulous anywhere.

I had to give my bench a good sanding. It had spray paint and spackle, and who knows what else on it since it had been sitting in the basement for a few years. You can still sorta see a little of the red spray paint, but it doesn't bother me too much. I didn't stain the wood, but I did give a nice coat of lemon wax just to help bring out the grain.
Now I realize that my little bench isn't nearly as beautiful as the World Market version, but bare in mind that it cost me under $10 to make, while the inspiration version retails for $149. So, while my bench may be a little rough around the edges...literally, I saved myself a whopping $139, so who really cares.
Teacup Clock Tutorial
I mentioned in my teacup lamp tutorial that I made a teacup clock awhile back. I've had several people ask me to post my tutorial on making a teacup clock. And I am happy to oblige.
The love affair began when I came across this picture by happenstance.

I thought it was pretty amazing. I loved the idea of using old tea cups and giving them a new purpose. Then I looked at how much the puppy was selling for...$350. Ouch!!!
I knew that I could make a clock that would be just as attractive and better yet personalized to my liking, for a fraction of the price. So I got to work.
I will apologize now for the lack of pictures. I made my clock several months ago...before this blog was even a twinkle in my eye. Hopefully you'll be able to understand my intructions. If not, please feel free to contact me with any questions.
Here's what you need:
4ftx4ft piece of underlayment $6 (available at any home improvement store)

12 cup and saucer sets (I spent around $25 total for all of mine)

1 clock movement and hands (you can buy movements with or without hands. I bought a kit without as I already had hands I took off an old clock. Price will vary depending on brand and size of hands...somewhere between $5-$15)

paint/stensil/stamp (or whatever you want to use to decorate your clock)

Epoxy $4 (make sure it's for glass and porcelain)

A couple nuts and bolts

Photo wire

I went to my local thrift store and purchased a majority of the cups and saucers sets. (I found one set at TJ Maxx and two at Tai Pan...a local interior decorating store).
I purchased a piece of half inch thick underlayment for the base of the clock. (Note: underlayment is not the best quality wood. It splinters. But, because I knew the clock would be hecka heavy after gluing all of the tea cups and saucers on, I wanted the board to be as thin as possible. Plus it was cheap...six dollars for a 4x4piece. If you want something a little better quality that's totally fine, just bear in mind the weight of the completed piece.)
I marked the center of the 4x4 board and hammered in a nail. (I don't know about you, but I don't own a compass large enough to accomodate a clock of this size, so I had to improvise.) I cut a piece of string 27 inches long (note: the actual diameter of your circle base will end up being twice the length of the string...so, my clock base ended up being 54 inches, or 2 1/2 feet in diameter. It is completely up to your discretion how large you decide to cut your circle (I placed my cups and saucers on the wood prior to cutting it and measured to come up with the number 54 inches...not very scientific, but it works.)
Then, I tied one end of the string to the nail in center of the board and a pencil to the other end. Pulling the string as tightly as I could, I traced a large circle on the board.
I removed the string and nail and cut the circle out with a jig saw.
Next, I drilled a bigger hole in the center of circle to accomodate the clock mechanism.
Here's where you get your creativity on. Paint and/or decorate your clock face to your liking. I chose to paint mine a light, turquois-y, blue color with black and cream accents.
I found a foam stamp at Michael's for $1.99 and used it to decorate the center of the clock

and around the border.

After the paint was thoroughly dry, I glued my teacups and saucers on (I layed all of my dishes out first before gluing, to make sure I liked the way everything looked).
I left them to cure for twenty-four hours.
Then I mounted the hanging wire to the back. It's really important that you prepare your clock with something stong enough to accomodate the weight. I had my stud muffin drill two holes, on either side of the clock...at "10" and "2" (Please note that I purposefully waited to drill the holes until after we had already glued on the plates and cups. It would have been easier to do it before, but I wanted to make sure the holes would be concealed by the saucers so we did after they were glued on).
We screwed a heavy duty bolt into each hole and secured it on the front with a nut.

Then we tied/twisted the wire onto each bolt in the back.

Finally I mounted the clock mechanism to the back and affixed the hands.

I popped a battery in the back and watched her tick.

I ended up spending approximately $45 to create my personalized teacup clock, compared to $350 for the original. It took a little patience 'and a little work, but it's totally worth it, dontcha think?
Vintage Look Crates Tutorial
Introducing my newest obsession...

I love crates...especially the old, vintage-y ones. I love the color and the lettering on the side. I see these bad boys and my mind goes crazy.
Just look at some of the amazing vignettes you can create with them.
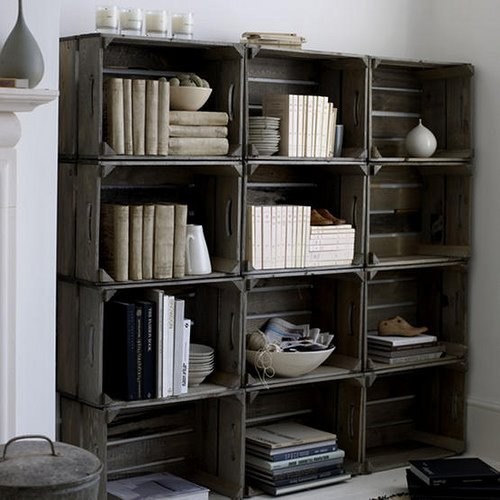


I'd love to get my hands on a dozen or so of them, so I could create my own shelves (how fun would they be in a playroom?), but I've had a hard time finding some and the ones I have found are a little pricy so that dream will have to wait...for now.
I did, however, come across these little guys at Joanne's the other day. They were $9.99 each.

I know...blah. But look at these. With a little stain and some glaze you can turn a drab "new" crate into a fab "old" one.

I started out by staining the crate. The stain I used was ebony (it's all I had on hand), but I would recommend something a little lighter, like walnut.


Next I glazed over the stained crate. I mixed up my own glaze using


After the glaze was dry, I stensiled on some lettering and...of course, numbers.


These bad boys are sitting at my shop currently, but I have my fingers crossed they don't sell. I think I might want to use them in my bathroom as shelves and to replace the boring old towel rack. I'm in the process of revamping my bathroom, so I'll be sure to post the before and afters when I get it done. Could be awhile, but...
P.S. If any of you have used crates in fun and different ways I'd love to see your pics. I'm always up for fabulous decorating inspiration.
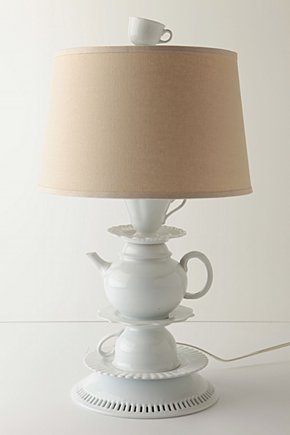
Knock Off Anthro Teacup Lamp Tutorial
As I mentioned in an earlier post, I have been slightly obssesed with lamps as of late.
So, when I came across this lamp at Anthropologie, I knew I had to try and recreate it.
I made a teacup clock a while back and ever since then have had a little preoccupation with teacups and saucers. I can't go to the thrift store without browsing the dish section and as a result have acquired quite an assortment. I was excited to come across this lamp so that I could put my growing collection to use.
Here's what you'll need to make your own lamp.
One bowl
I just found a cereal bowl from the thrift store that had a fairly wide base.
One teapot
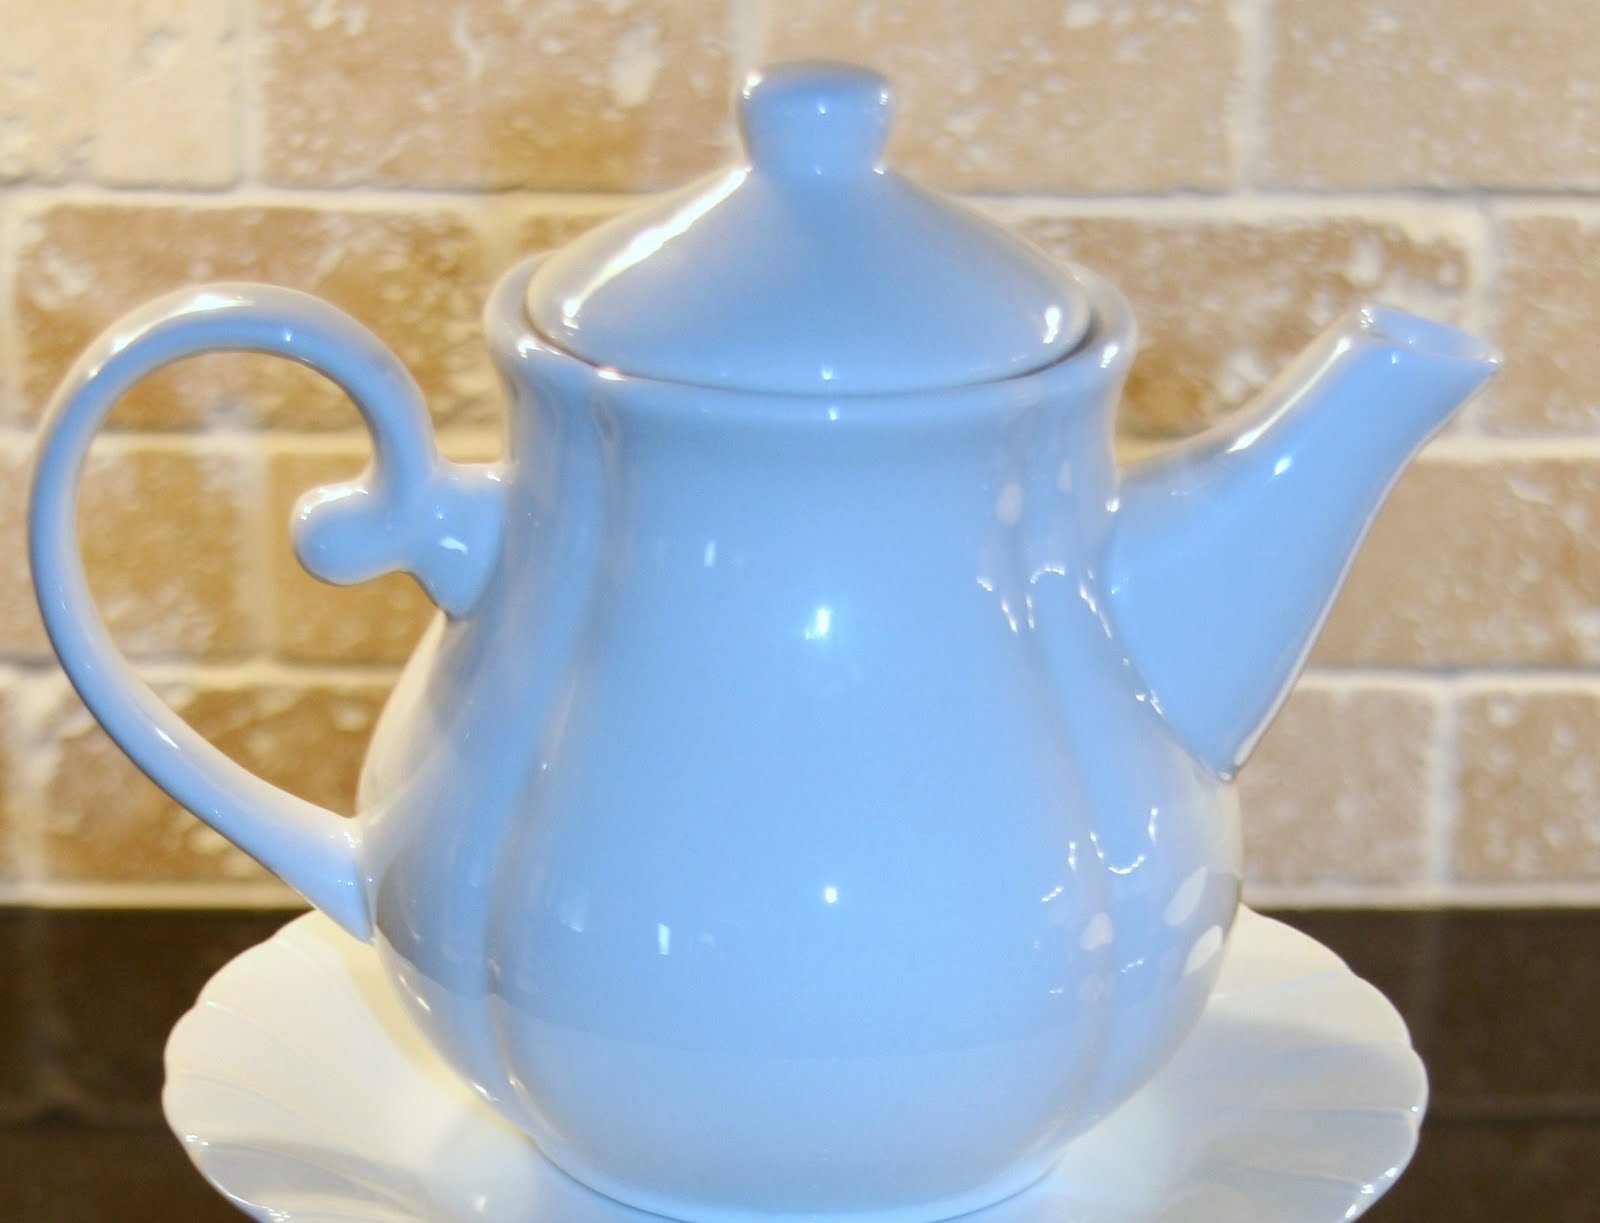
I found mine at Ross for $4.99.
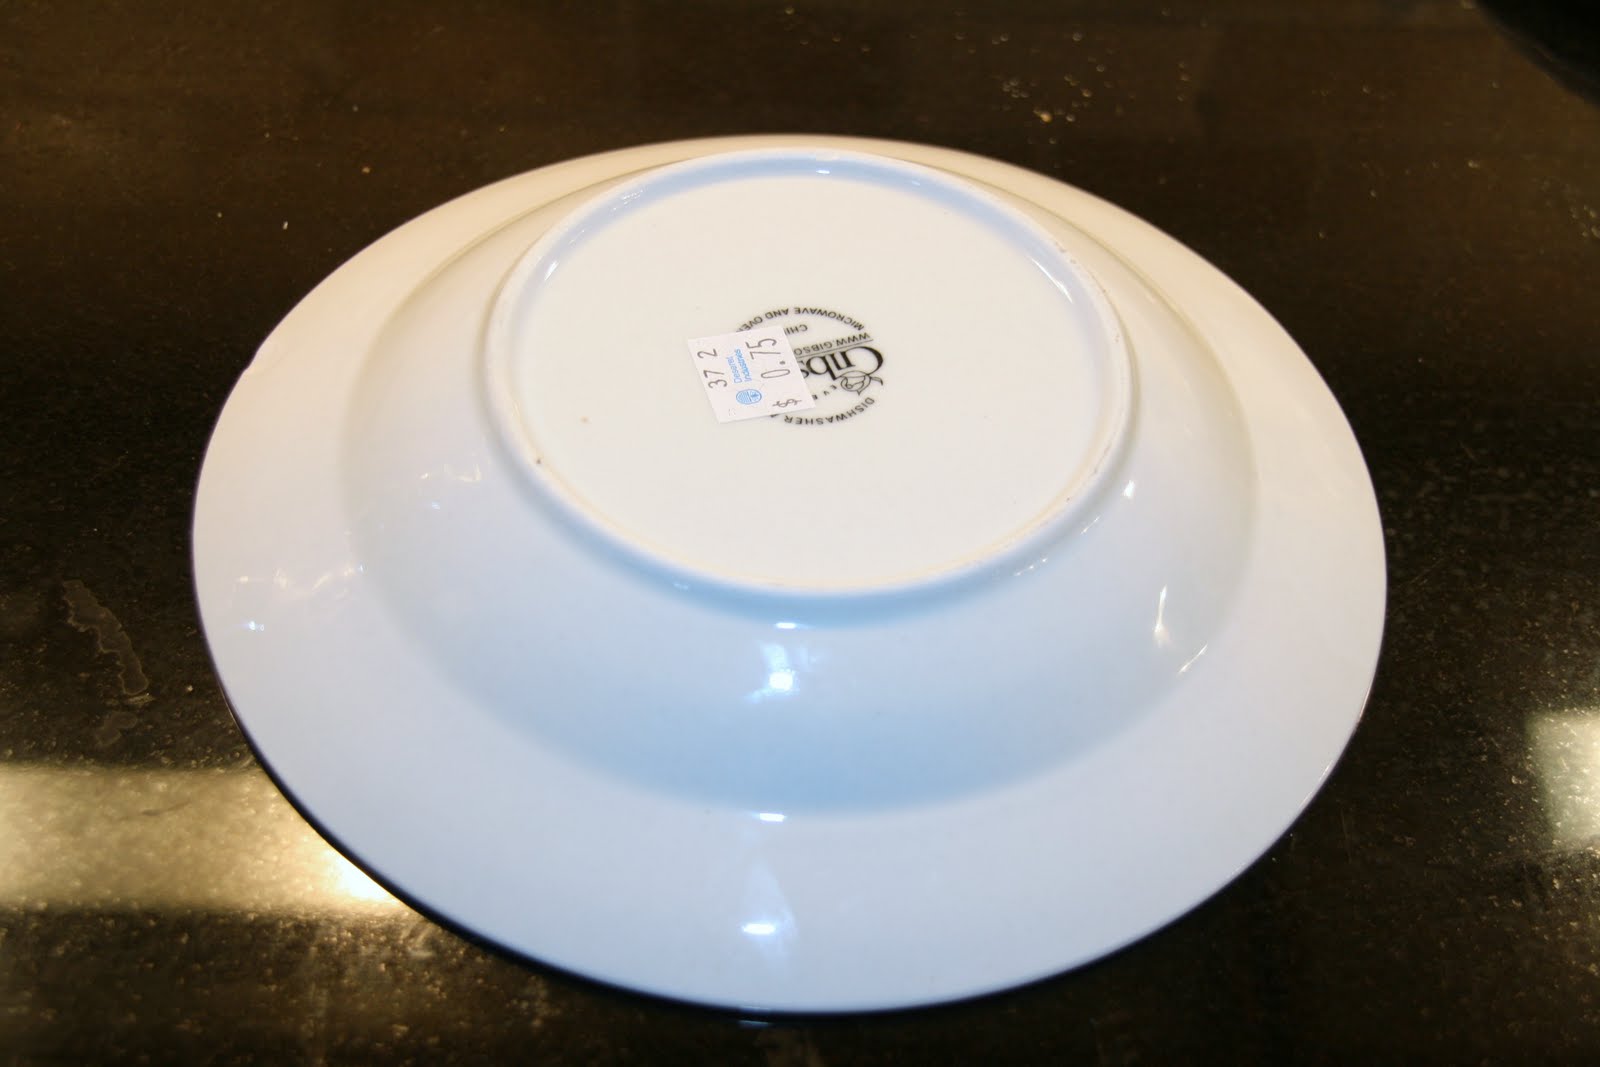
An assortment of saucers(three) and teacups(two)
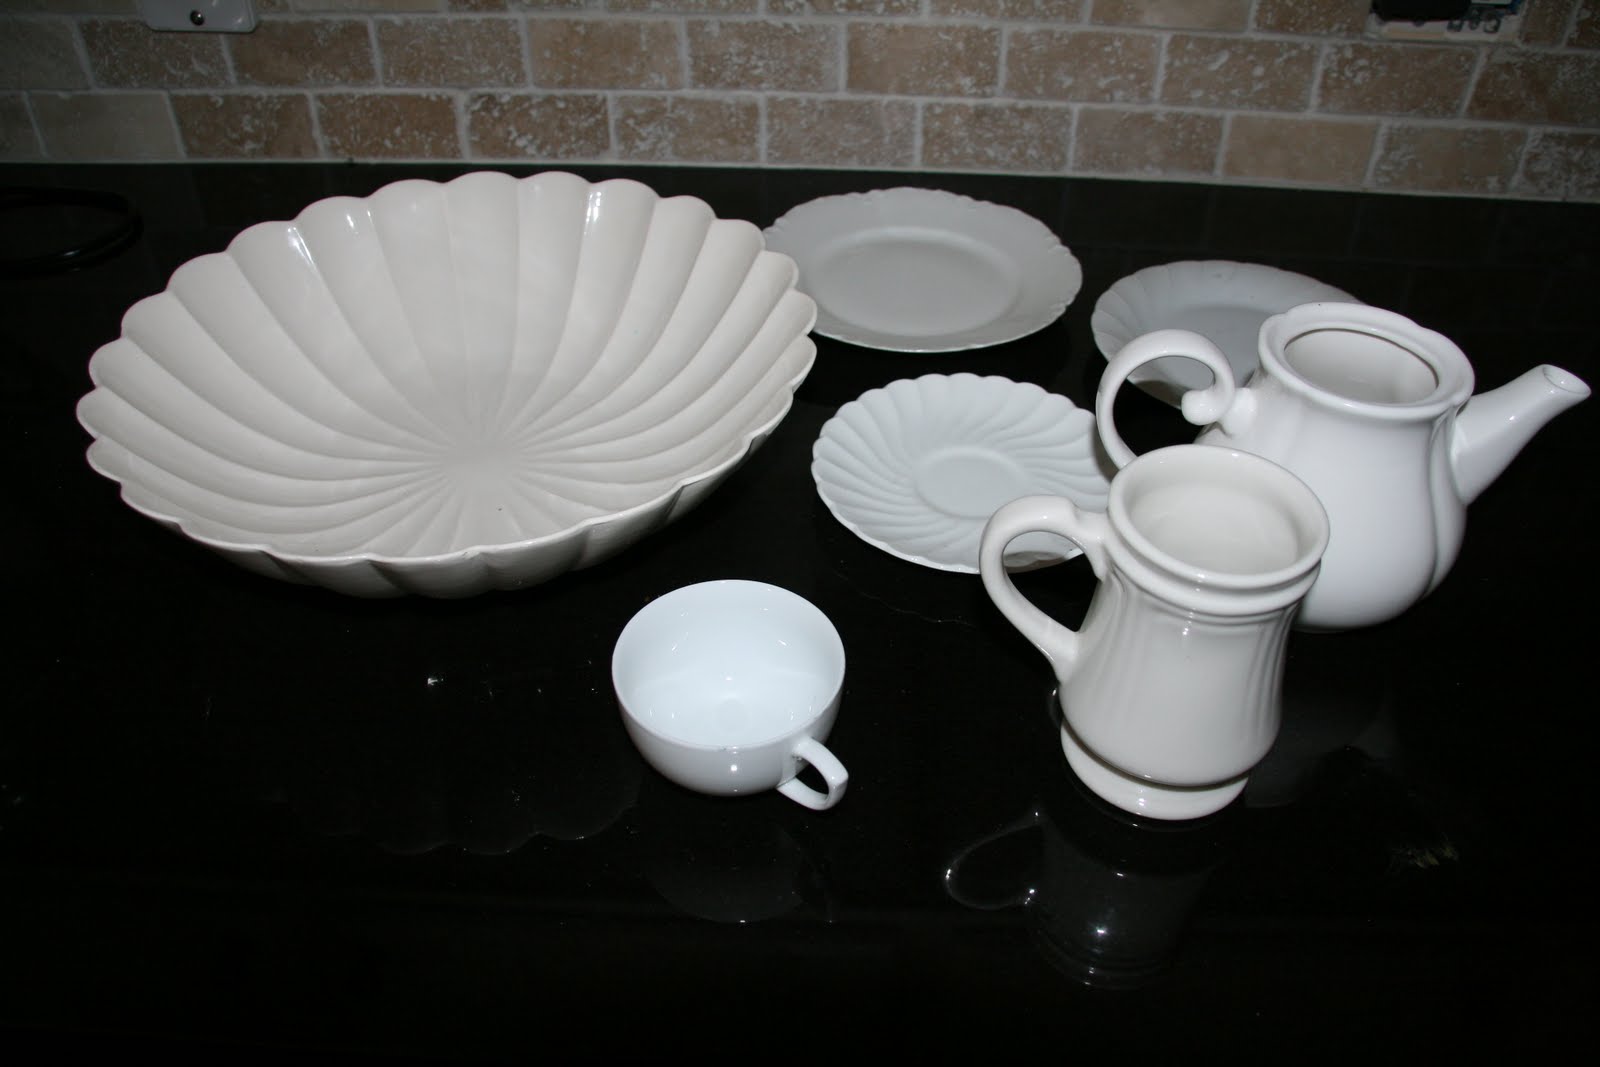
I found all of my cups and saucers at the thrift store for $.50 to $.75 a piece (except for one that I found at TJ Maxx for $1. As a sidenote, when I was making my teacup CLOCK, I found that you could purchase cup and saucer sets at TJ Maxx for around $2.99). Make sure to grab duplicates of any to have as backups.
1 lamp kit
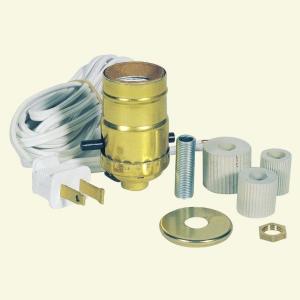
I used this kit from The Home Depot. It cost $9.97.
Gorilla Glue Epoxy
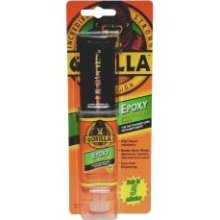
You can buy this at any home improvement store or at Walmart for around $4. I price checked and found it the cheapest at Walmart.
A Drill and Diamond Bit(bit specifically designed for use on porcelain, ceramic, glass etc.
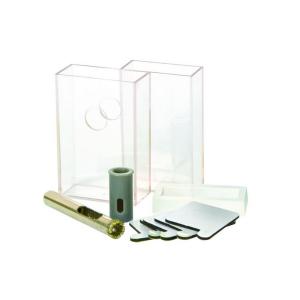
Again, you can buy these at any home improvement store. The price varies depending on brand and added accessories. The bit I have pictured above is not the one I used, but rather one that I might try using for the next project. I was not happy with the bit I used, so I won't even bother telling you it's name. The above bit costs around $10...which is how much I spent on my crappy bit.
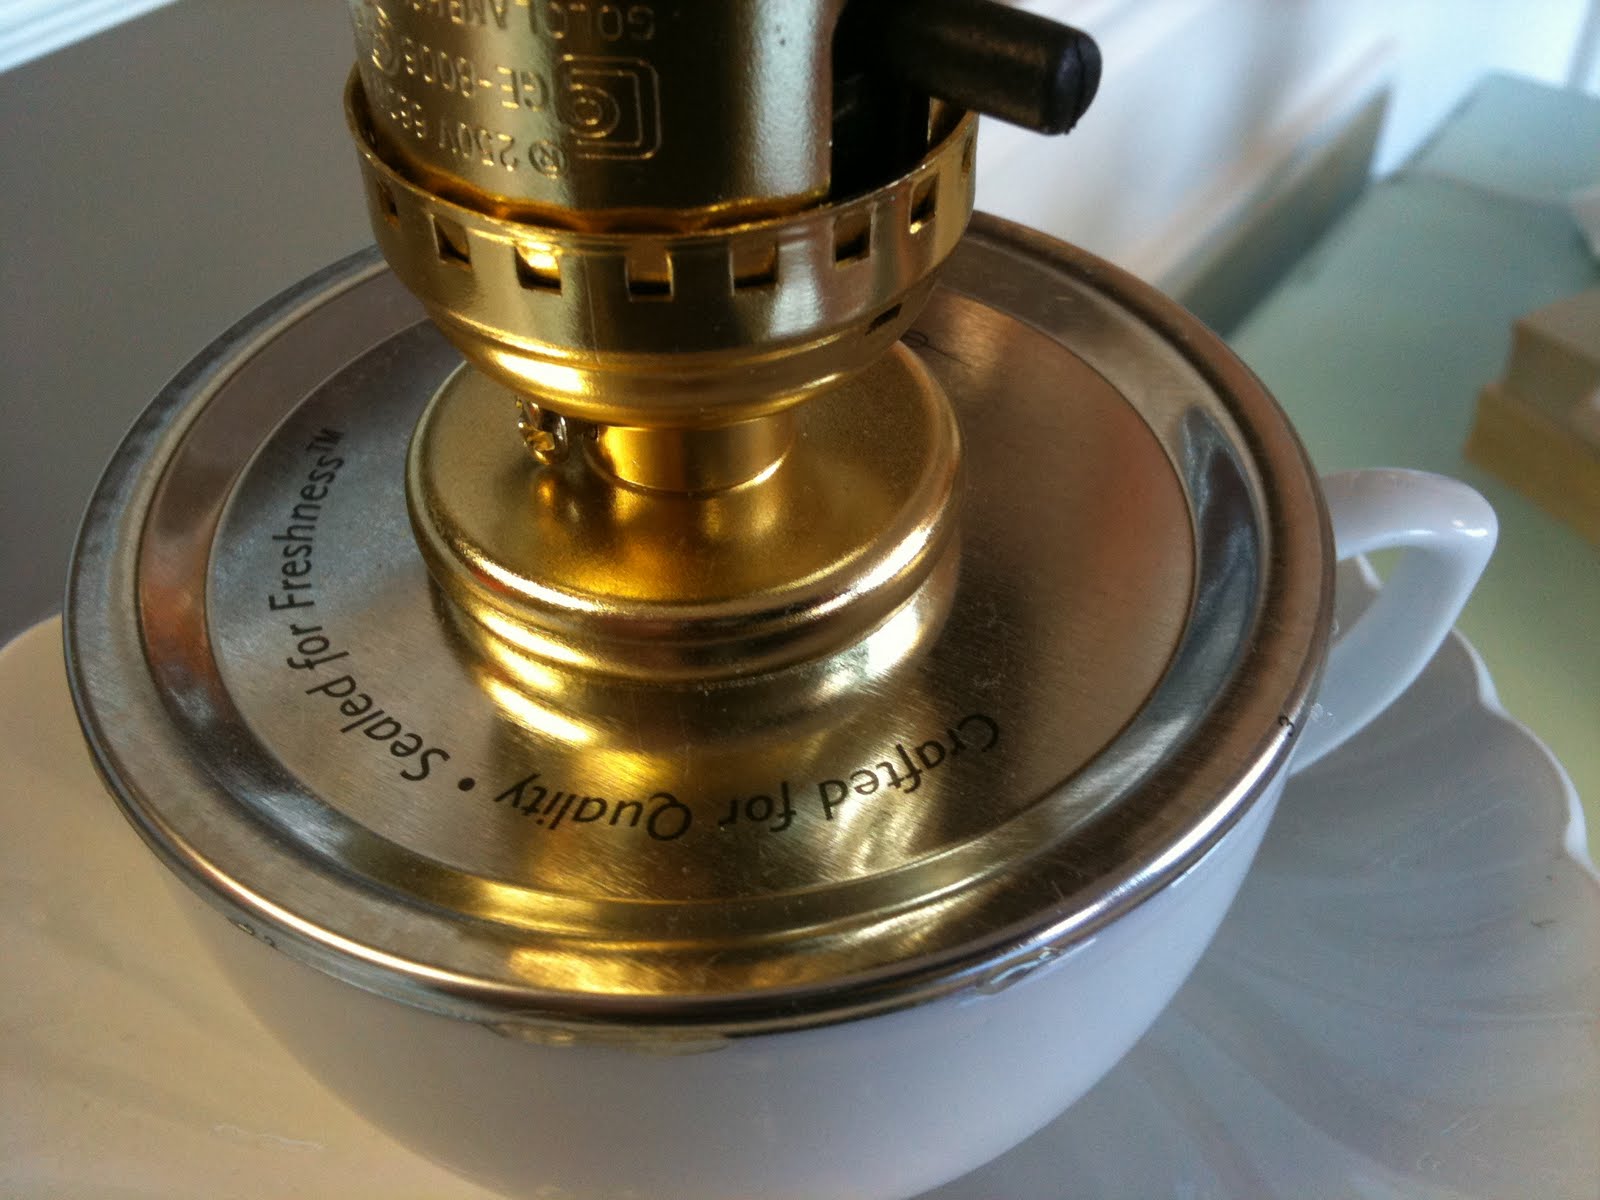
One wide mouth canning lid
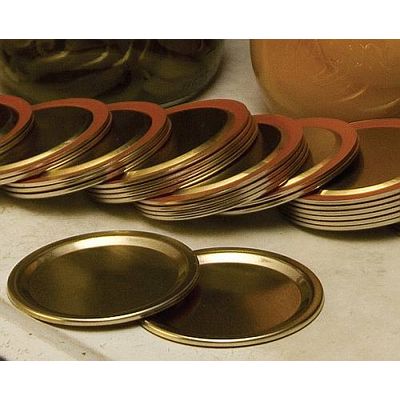
The canning lid is what you will use to mount the socket on to.
Okay, now onto the good stuff.
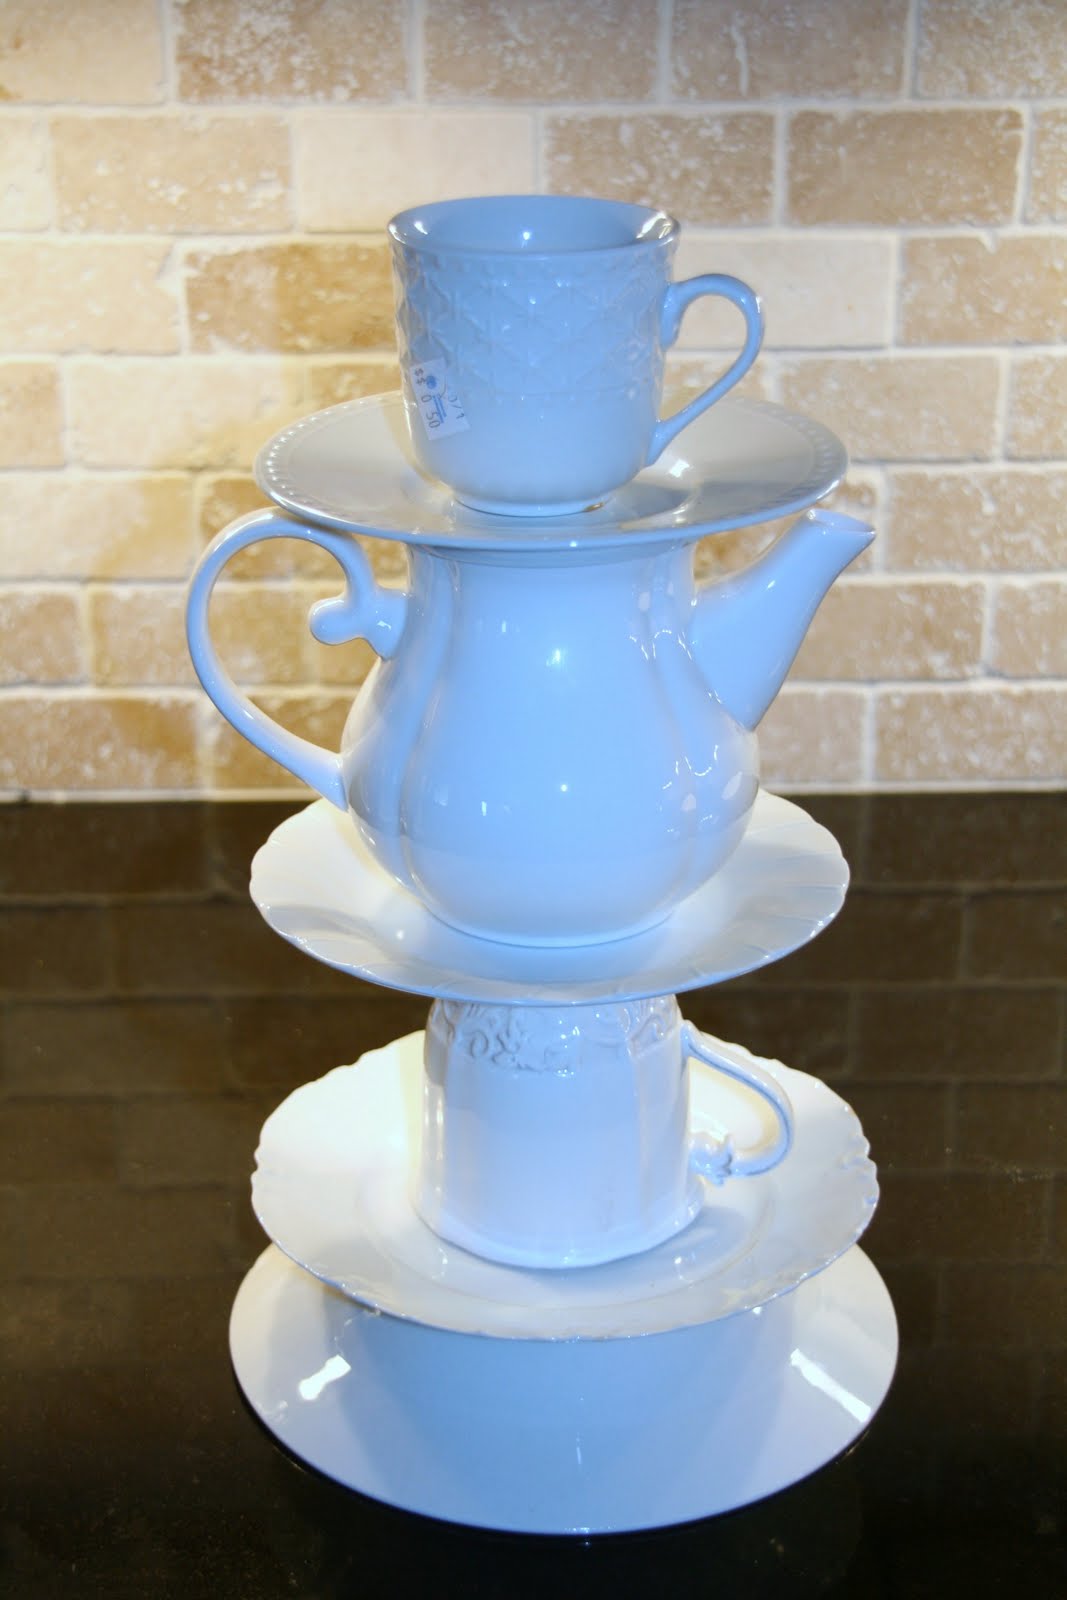
Dry fit all of your dishes to make sure you like the way everything sits on top of each other. Some dishes seem to sit more securely on others.
Be sure to alternate between dishes and cups. Here's the order I followed:

bowl, saucer, teacup, saucer, teapot, saucer, teacup
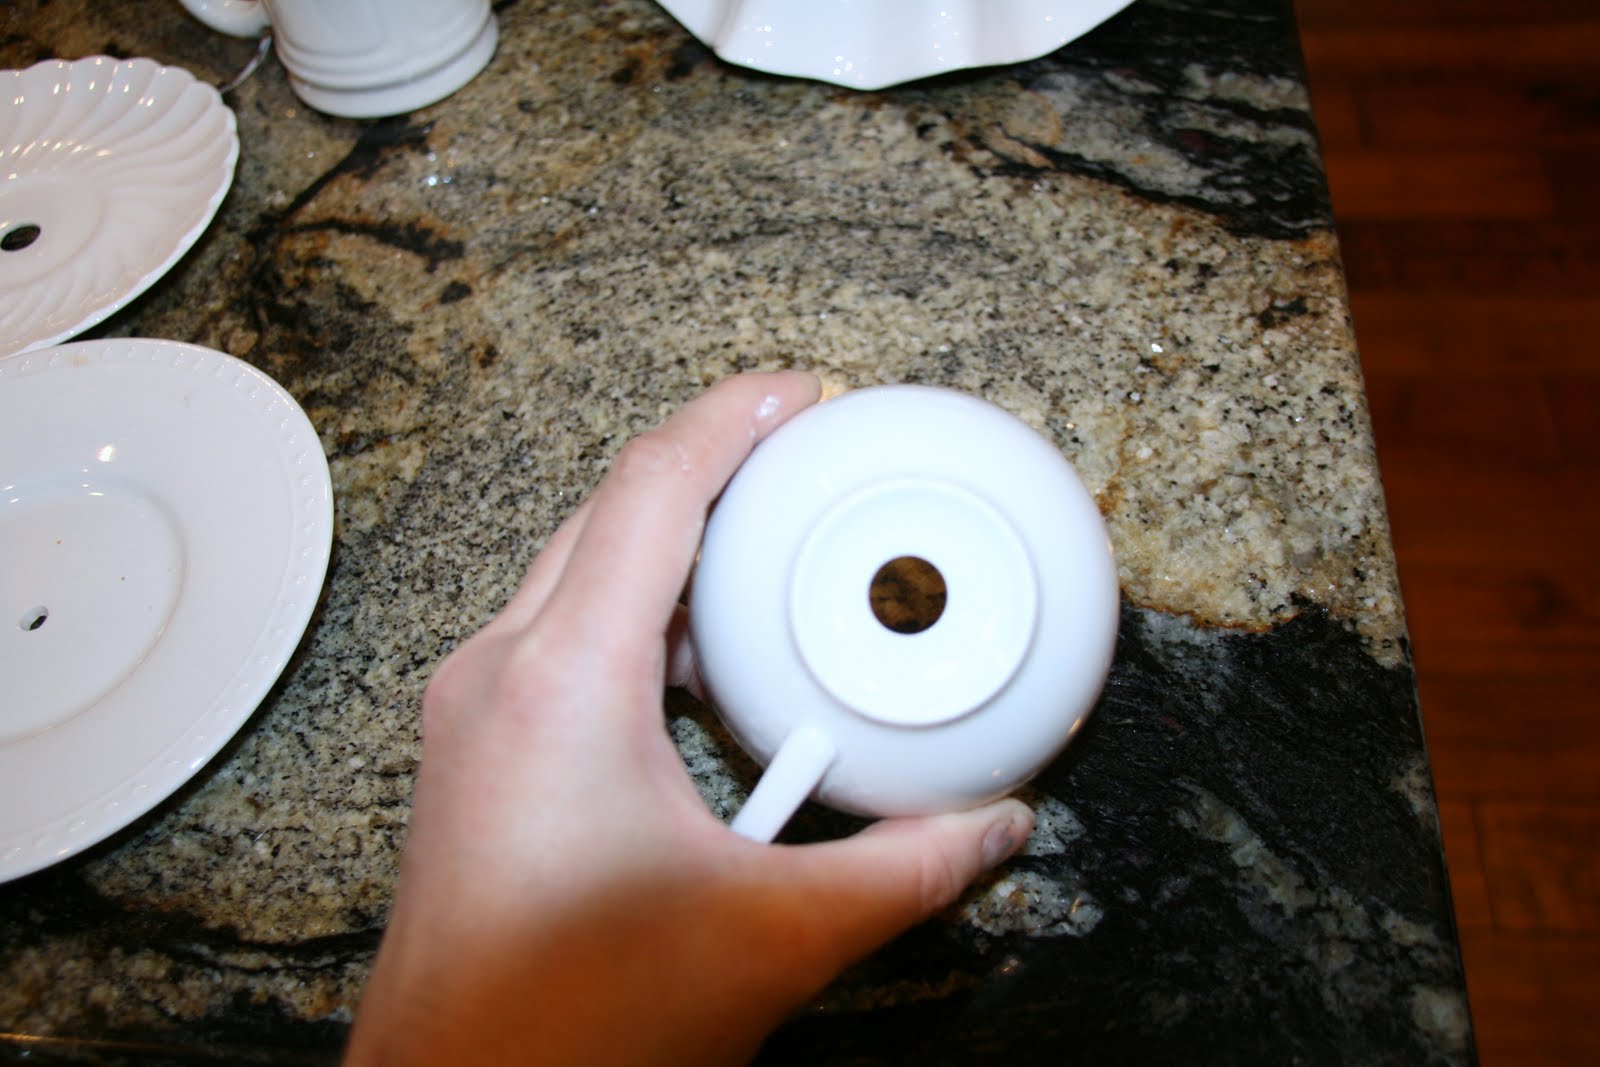
Once you've settled on an order you need to drill a hole through the center of each piece. (Here's where patience and a gentle touch come into play). It took me several minutes to drill one hole. I blame that primarily on the bits I was using, but nevertheless, you do not want to rush this process or you will end up with a pile of broken dishes. Apply steady pressure but be gentle. Let the drill do the work.
The bowl will need a second hole drilled on the side as it will need to accomodate the cord and plug. I do not have any pictures to share as I shattered my bowl when attempting this feat. Instead, I purchased a new bowl from Ross for $2.99. It had a ruffled edge which left gaps around the bottom where the bowl sat. I was able to easily pull the cord through one of these gaps without having to drill a second hole. If you happen across a similar bowl, I would highly recommend purchasing it. Not only does it make for an super cute base, it saves you having to drill another hole.

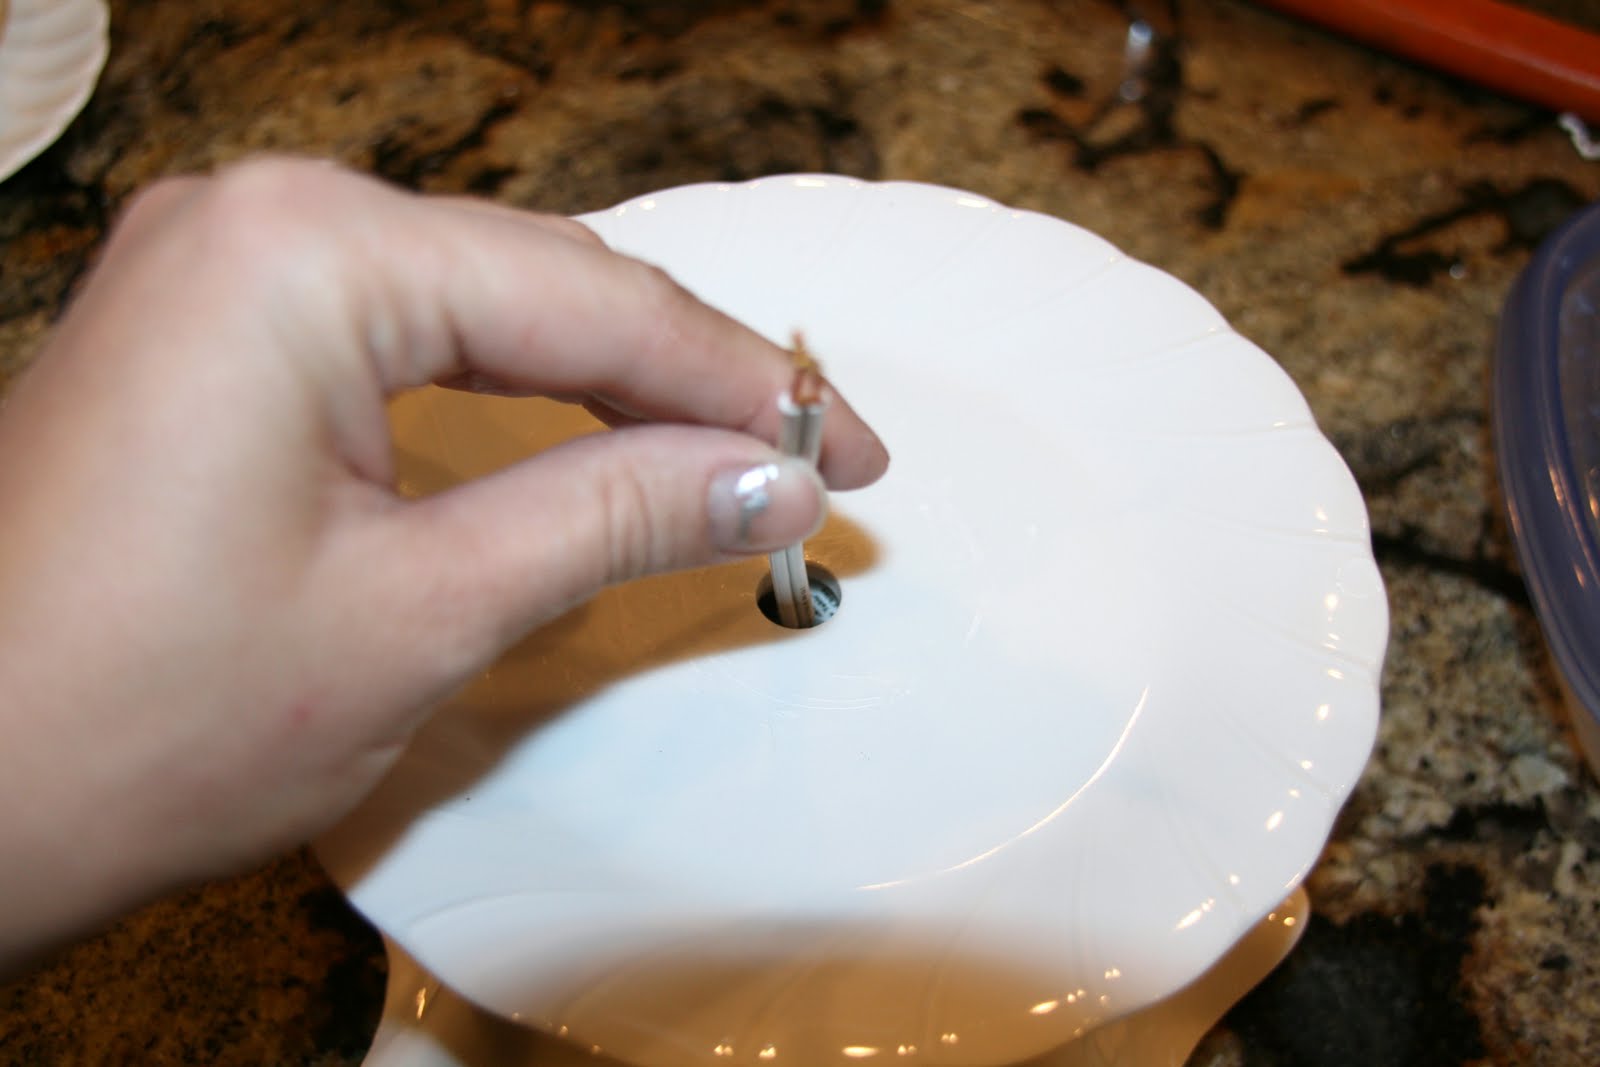
After all of the holes have been drilled it's time to start gluing. Epoxy tries pretty quickly, so I opted to mix a little at a time...as I needed it. I found it easier to thread the lamp cord through the holes as I glued. That way you avoid the cord getting stuck or lost somewhere along the way.
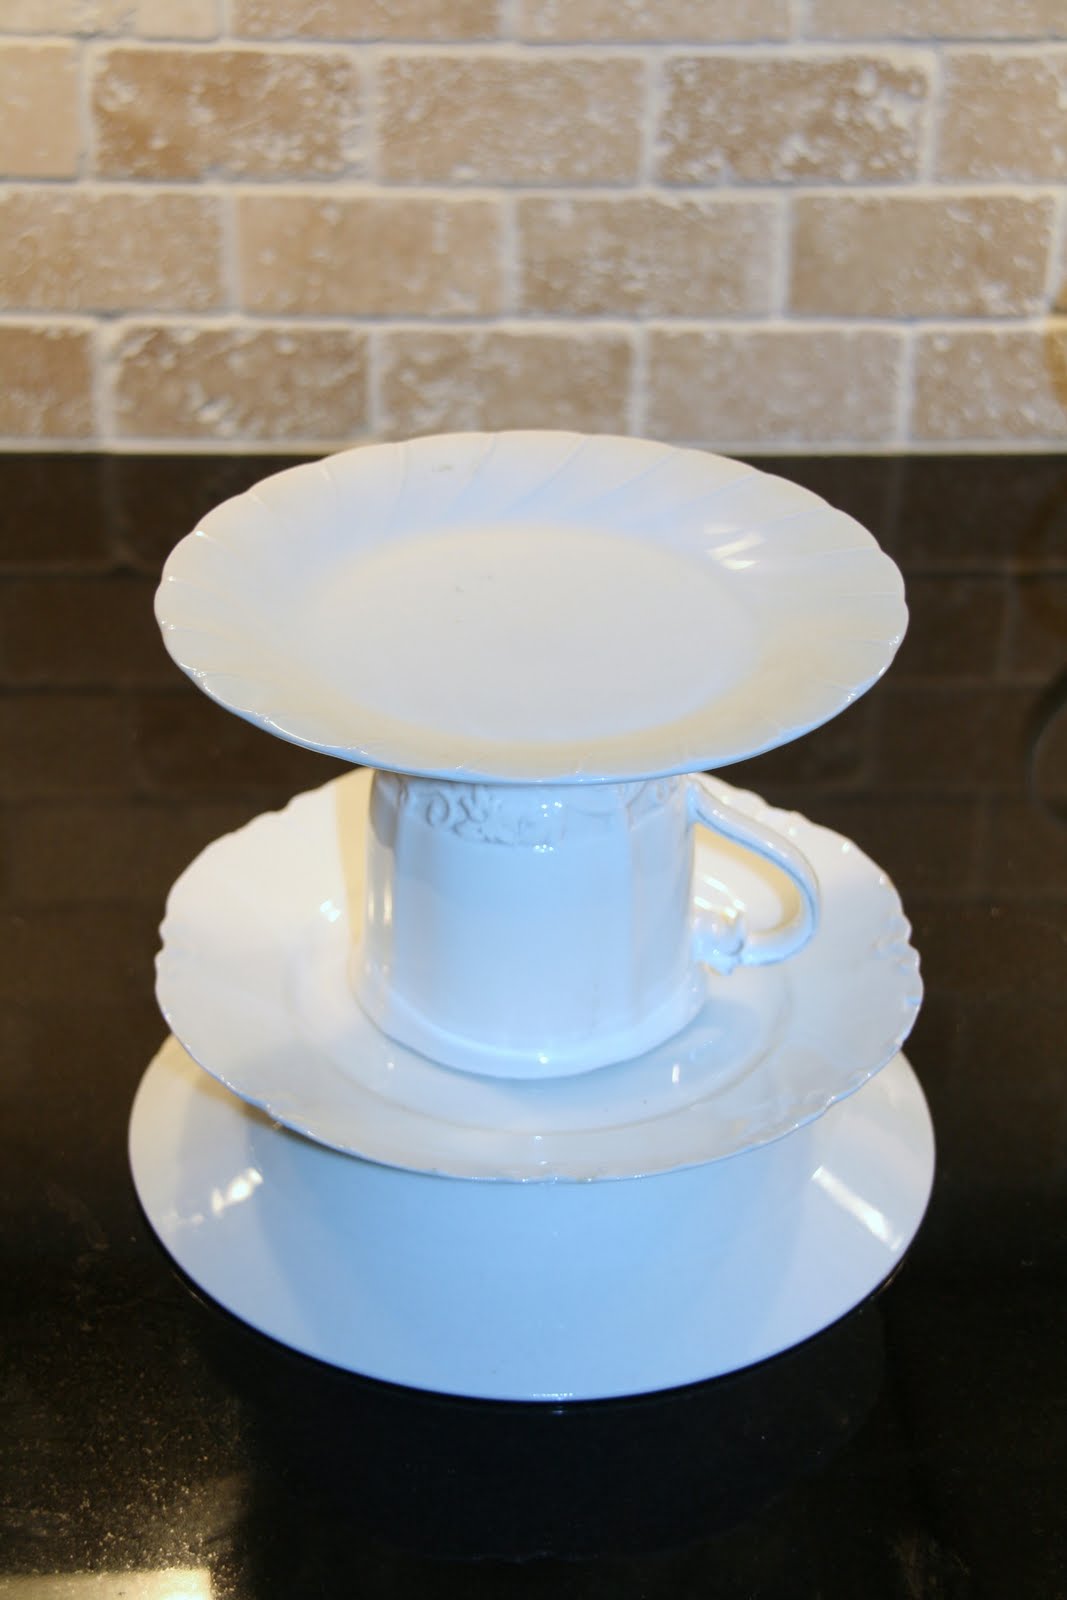
This is how your lamp base should look once you've glued it all together. You're lamp cord should now be poking through the teacup at the top. (My pic doesn't show it, but you understand right?)
The last task is to attach the socket to the cord. Rather than try to explain this, I will simply refer you to the directions that came with the kit. Please note, that your kit came with three different sized rubber stoppers. They are used for mounting the socket to the lamp base. Instead of using them, you will need something larger that can sit on top of your teacup without falling in (I found that a wide mouth canning lid fit perfectly. If your teacup opening is too big or too small you can substitute it with something else...a smaller canning lid, a piece of wood cut slightly larger than the opening). You will need to drill a hole through the center of it just large enough for the bolt from the kit to pass through . Once you've assembled your socket and fastened it to the canning lid you can glue it to the top of your teacup. It should look like this when you're done.
I know it sounds complicated. I assure you it really isn't. The kit comes with very detailed instructions and pictures. But, don't be ashamed if you have to enlist the help of a stud muffin. I did.
Once the epoxy has time to cure, screw on bulb, add a fun shade and test the sucker out.
VICTORY!!!

Isn't she just gorge. I love, love, love her...even though I almost threw her across the room halfway through the process.

When it was all said and done, I ended up spending $10 for the lamp kit, $10 for the drill bit, $4 on epoxy, $12 on dishes (that includes my replacement bowl) and $14 on the lamp shade (which I found a Wally's...aka. Walmart). That's a grand total of $50 (...compared to Anthropologie's $198. Boo-ya. And, I actually like mine better!
Halloween Garland Tutorial
Kay. I've made it pretty clear how I feel about fall...Halloween specifically. But in case you didn't already know, I love, love, fah-reakin' love Halloween.
I love making all sorts of crafts and decorations for the holiday and I'm always looking for something fun and new.
Here's a simple and festive tutorial on how to make a Halloween garland that will totally get you excited everytime you look at it.

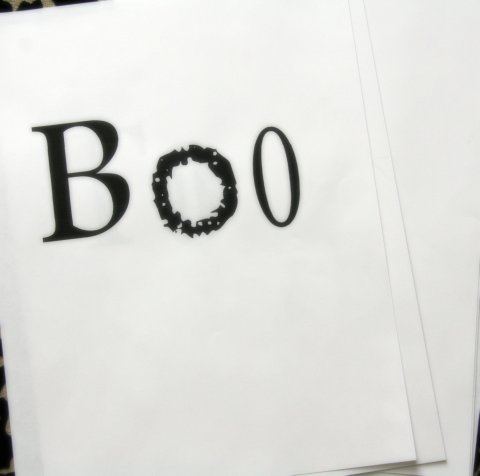
First you need to decide on a salutation: Happy Halloween (a little bland, but it works). Perhaps, All Hallow's Eve, Boo To You, Eat, Drink and Be Scary or Trick or Treat.
Once you've settled on your wording you can start gathering supplies. For this project you will need.
Letters...which I just enlarged and printed off the computer.
An assortment of scrapbook paper.

Some embellishments...buttons, stickers, ribbon etc.

A glue gun.

Twine...or something to sting your garland on to.

To start, cut out all of your letters and set them aside.

Next, cut squares/rectangles out of your scrapbook paper. Make sure they are large enough to fit the letter and some embellishments.


Arrange all of your squares and letters.

Layout all of your embellishments.

Once you have everything the way you want it, start glueing.
You can stop here, or mount the squares on a contrasting piece of paper, like I did.

If you have distressing ink you can add a little of that around the edges for a more vintage feel.


Finally, punch holes in the upper right and left corners of the squares.

Then string them onto your twine.

You can hang this baby just about anywhere, on a wall, above a door, over a mantle...
And it costs only dollars to make. Bonus!!!

Knock Off Vintage Feed Bag Tutorial
Okay. Is it just me or are vintage feed bags the hot item right now? I had no idea until I started seeing them all over various blogs and in my newest Pottery Barn Magazine. I may be a little late in the game, but better late than never I suppose.

And as with most fads, I find myself wanting in on the action. However, I was completely caught off guard by how expensive the little buggers were. When I saw that Pottery Barn was selling vintage feed back pillow covers for $89-$99...for one, I about had a coronary. As much as like them, there is absolutely no way I can justify spending that much...especially with the constant threat of cheeto fingers and chocolate milk face (did I mention I have five kiddies?)
So that gots me to thinking. How could I get the look of vintage feedbags without having sell one of the kids on the black market to fund my investment? Answer: make my own knock offs. So that's what I did.
Here are the items you will need:

(You could also use muslin or canvas if you're not into painters tarp...but it's hecka cheap, $6 for twenty-five square feet).
Oh, and some painters tape (not pictured).
To begin, decide on the size you want your pillows to be and cut your drop cloth accordingly (add and inch to your measurements to allow for seams.)
The pillow inserts I used measured 21x14 inches, so I cut my fabric 22x15


I don't know if you noticed, but the pillow covers in the Pottery Barn Mag are similar in design to a pillow case...meaning they have only three sewn sides. The fourth side is left unstitched and will provide the opening for your insert. I would recommend that when cutting your fabric you use the selvage edges on the fourth side. It will save you the hassle of having to hem the ends.
Once you've cut your pieces, it's time to tape off a pattern. I only painted the pattern on one side of the case, but if you're ambitious you could do both. I borrowed a design right off the Pottery Barn sample.
I started with one, thin, vertical stripe.
Just tape off the desired width using painters tape.

Using your stippling brush, stipple on your color inside the two pieces of tape (make sure that you are moving your hand in an up and down pattern...like you are tapping the fabric). I used acrylic craft paint in pewter grey.


Then add two, wider, vertical stripes on either side of it using the same method with the painters tape (again I used acrylic craft paint in Sky Blue), and a few numbers at the bottom. I use a stencil I purchased for $2 at Joann's. Follow the same stippling technique used for doing the stripes.

You can also add a few numbers or letters for a little something extra.

Now you are ready to sew your pieces together. (I recommend pinning the pieces together to minimize any sliding or moving of the fabric. Be aware that you want the right (or front sides of the fabric facing each other when pinning. The wrong sides of the fabric should be facing out.

Sew up the three raw, or unfinished edges, leaving the already finished fourth edge open. Then turn your case right side out.

Then put the insert inside your finished case.

Here are a few other variations I did. You can keep it simple...

or make it a little more complicated. I found this cool chicken pattern on the "net" and downloaded it. I made a stensil out of heavy cardstock (you could also use contact paper, or a plastic folder...whatever you have lying around the house). I just copied the image onto my cardstock then cut out the image of the chicken. I stippled a little gray paint over it and I turned out great. I added the wording using the letter stensil I purchased.

Boo-ya. Knock off vintage feed back pillow cases for $2.50. Now that's more like it.

Old Bi-fold turned Partition
Okay, so remember these bad boys?

I picked 'em up at the D.I. for $20. Maybe a bit pricey once you factor in the price of paint and primer etc., but I had beeen waiting and waiting ever so long for them so I popped on 'em.
The poor things were covered in mummified spiders and pet hair...ick.

But, I saw through the cobwebs and knew that they had great potential. After a thorough rub down, I primed them.

I didn't take a picture. But I only wanted to use three of the four panels, so I unhinged one set and used that hinge to attach the third panel to the other set of two. I did this after they were primed, but before I had started on the painting...so I didn't mistakenly knick up the paint.
After they were primed and hinged together, I sprayed black paint everywhere I wanted it to show through. I used my candle wax method (which you can learn about here.
I could have spray painted the whole project black, but I knew where I wanted the black paint to show through so I just spot painted instead.)

Then I waxed over all of the black areas with an old candle I had on hand. I know it's not pretty, but don't worry.

Then I sprayed on the top coat in my favorite color...Ocean Breeze by Krylon.

Then, I rubbed, rubbed, rubbed...where I had waxed.

Then glazed a little too...for good measure.

And voila...a cool, rustic partition; perfect for concealing clutter or spicing up a bland corner.

Here she is in her new home.


Just pretend those smudges on the front of the piano aren't there.
Linkin up to:

Distressed Letters Using Candle Wax Tutorial
I know I mentioned something about decoupaging letters for my writing nook in my last post, but I decided to paint them using one of my favorite distressing techniques instead.
But first, remember how my "nook" looked before:

Looks pretty good, if I do say so myself. Keep in mind that I spent under $24 to create this little space.
That said, I felt like it still needed a little somthin' somethin'.
So, I decided to put letters inside the frames. I wanted them to look super old and weathered and I knew this candle wax technique would be perfect. I decided on the letters "e", "t" and "c"...an omage to my longwindedness, which I'm sure you've all realized by now.

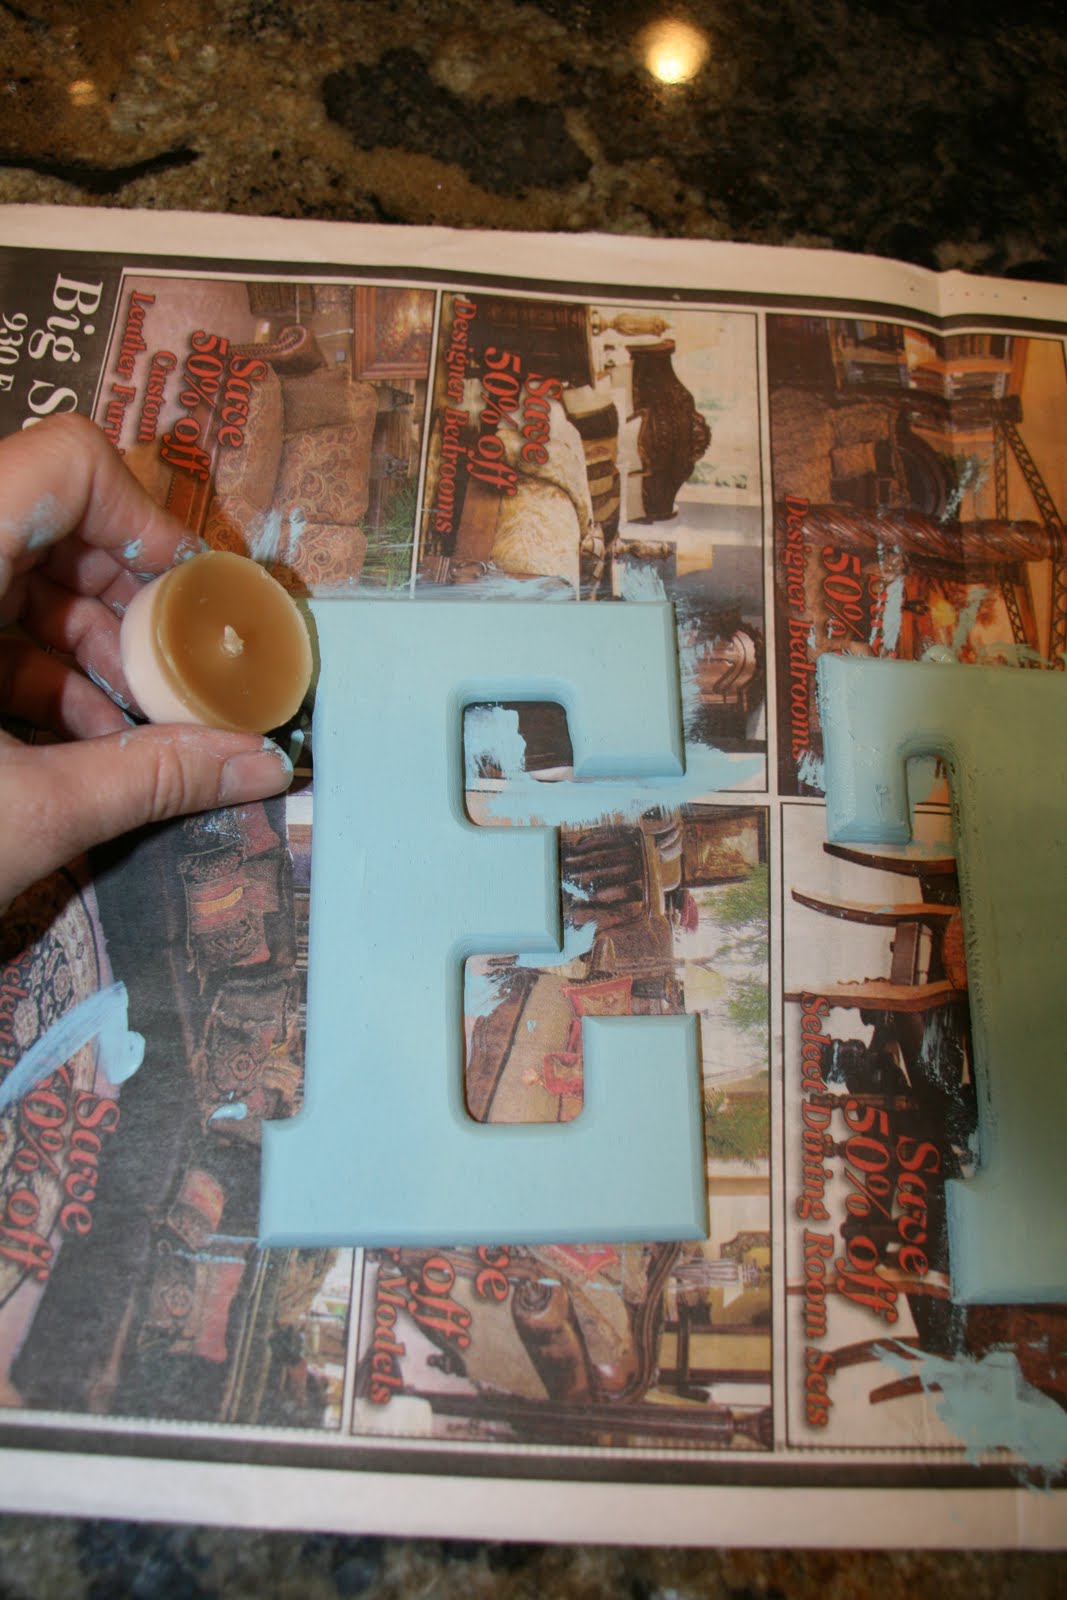
I started by giving the letters a base coat of blue paint. Note that I used tole paint for this project. Generally I would use spray paint, especially for a bigger project, but since I didn't have the exact colors I wanted on hand (and becuase I was too lazy to run to the store)I used tole paint instead.

After the letters were dry to the touch, I scuffed them up using a little votive candle I had on hand (spiced cider scent optional :)) The wax is going to prevent the second coat of paint from adhereing to the letters, so bare that in mind as you are waxing up your project. If you do happen to get wax where you don't want it, you can wipe it off with a dry rag. In my opinion the more haphazard you are, the better it will turn out, so don't worry too much.

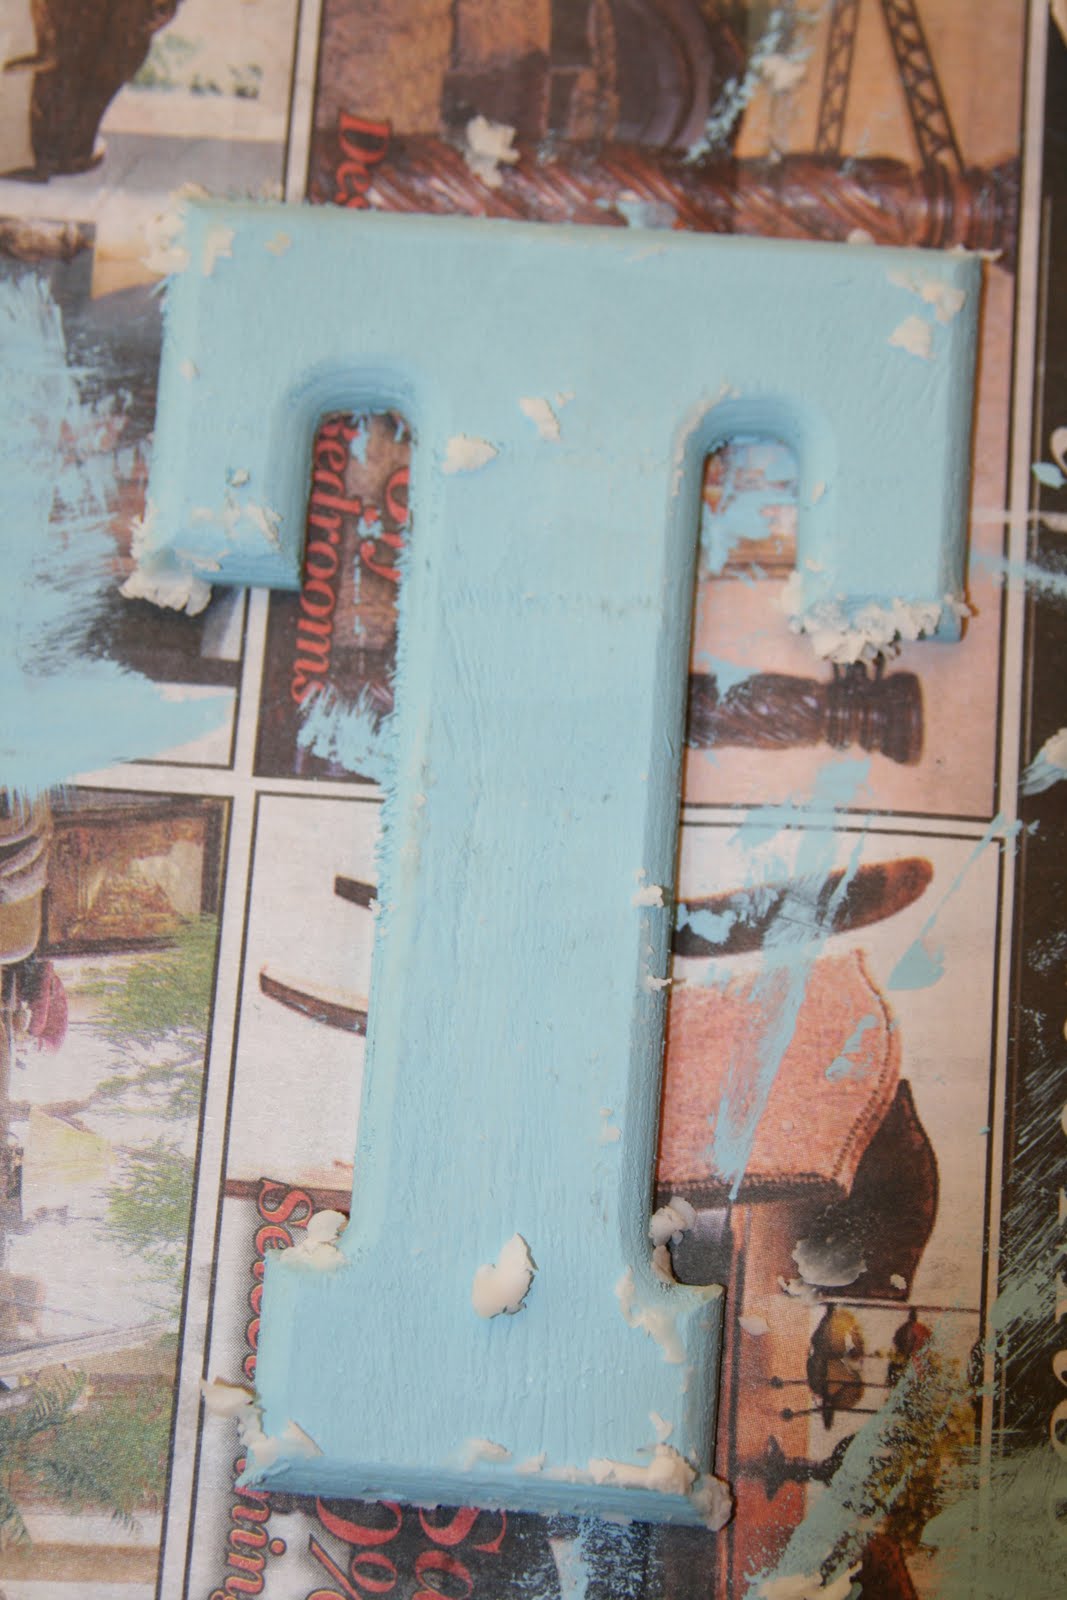
Next comes the top coat of paint. If you choose to brush paint rather than spray you need to be extra careful not to brush off all of the wax. I tend to prefer spray painting for this exact reason.

Once the top coat has thoroughly dried, wipe away all of the wax using a dry rag.

The base coat color with start showing through and reveal an awesome worn and weathered look of peeling paint.

I love how rustic they turned out.

And they seem to like their new home too.

I've actually used this technique on several larger projects.
My newly pimped out frame. You can go here for the how to.

And my bedroom dresser

I hope you try this technique out. It is super easy and the end result is always stunning and eye catching. Let me know how your projects turn out. Better yet, send me a pic or link to your blog. Good luck.
Pimp My Frame Tutorial
I don't know about you, but I like things chunky...salsa, peanut butter, babies and especially frames.
I know, by experience, that thick, lucious frames can cost as pretty penny. But, I have figured out a way to create your own chunk-a-licious frames for a fraction of the cost. All you need is an existing frame and some moulding.
Let the chunkifying begin.
Begin by removing the mirror or picture and glass from the frame and set them aside.
Next, measure all four sides of the frame making note of all the measurements.

These measurements will be used for cutting the moulding to size. I like to mark the board with the measurements and then compare them to the frame just to make sure everything looks right.


Now it's time to get the hubby to cut the moulding, or time to get your Bob Villa on and do it yourself. Just a reminder, the pieces will have a miter cut on either end rather than a regular straight cut. Mitered simply means cut at a 45 degree angle and looks like this.

I had never actually touched a miter saw prior to this project and cut all of the pieces myself. Using the saw is not that difficult. However, mitering all of the edges can get a little tricky. If you're measurements are not accurate the miters will not meet up properly. My suggestion is to cut your pieces one at a time and dry fit them to the frame before moving on to the next piece.
Here's what it should look like when it's done. Please note that although mitering can be a little tricky, it really isn't that difficult if you just take your time (which you probably wanna do anyway when working with a freaky, scary saw). And also bare in mind that it doesn't need to be perfect. In fact, the imperfections are what add character to the frame.

Once you have your pieces dry fitted you can begin gluing them to the existing frame. I used Gorilla brand wood glue. I don't know about you, but a big gorilla on the bottle seems like the strongest, dontcha think? I used clamps to hold the pieces together tightly. I also used a staple gun to stabilize the frame further. If you don't want the staples seen you can staple on the backside of the frame. Or, you can do what I did and staple the frontside. In my opnion the staples add a cool, rustic feel to the frame.

After the frame has had ample amount of time to cure...approximately 24 hours, you can paint it.

Be sure to place it in a prominent place in your house so that you and others can admire it in all it's chunkified glory for years to come.
Here are some before and afters of the frame I did.
Before:(

After:)

Uh-hum, yes those are Halloween decorations you see. Don't hate!
Mmmmmm. Chunk-a-licious.

Good luck on pimpin' your frame.
Halloween Inspired Pillows Tutorial
Okay, I promise I will stop posting about pillows. I just love them soooo much...and they are so cheap and easy to make. But I promise, I'll give it a break.
But first...

Awesome, right?
I used painters canvas again. The stuff is super cheap and the paint really clings to the rough texture.

I made my own stencils from images I found on the "net" and a font off the computer that I enlarged.

Then all you need is black paint and a stipple brush.

Stipple the paint on carefully...remember, up, down, up, down (channeling Mr. Miyagi).

Remove the stensil and let the paint dry.

That's it.
Did I mention that these gems cost me $1 a piece to make? I think I might make some extras to give out to friends.
I may have to put this fella on my bed all year round.

and possibly this guy too.


I love Halloween because it's the only time of year that "over the top" is acceptable. But I have to say, that I am really loving the simplicity of these Halloween pillows. They aren't in your face, but rather chic and elegant.
Give 'em a try. I think you'll like it.
(Wanna know a little secret. Instead of sewing up all four sides, I like to leave one unstitched. Then I use adhesive velcro on it so that I can make the case removeable. Just an idea. I like being able to reuse the inserts if I need them.)
Knock Off P.B. Number Pillows Tutorial
Alicia...this one's for you.
See these guys?

They are from the Pottery Barn. Simple, elegant, chic...if you don't mind me sayin' so. I love them. I want them. But, frankly, I am too big a cheapskate to buy them.
And anyway, they're sold out, so I couldn't buy them even if I wanted to.
I can't say for certain how much they were originally, but I dare say they weren't less than $30 a piece.
Always willing and ready for a decorating challenge, I decided to see if it was possible to replicate the beauties. I'll let you be the judge of whether it was a success or not.
The first thing I did was run to IKEA. I had seen online that they carried white, linen pillow covers. (The pillows from PB are a cotton/linen blend and I wanted to stay as true to them as I could). They were $6 and I bought four, for a grand total of $24. (Still less than what you would have spent on one from PB).

Everything else I needed for the project I had at home. (black paint, stippling brush and garbage bag).
I made my own stensil using a font on the computer that I enlarged. I tried to choose a font that was similar to the one used on the PB sample. I traced the image onto heavy duty cardstock then cut the numbers out.

Before you start stenciling on your numbers it is a good idea to put a piece of plastic in between the two layers of your case (I used a garbage bag). You don't want the color bleeding through.

Next, center the number onto the pillow cover...

then using a stippling brush apply black paint all over inside of the stensil. (You can go here to learn how to stipple).


As you stipple the paint on, be sure to keep your hands clean and free of any awol paint splatter or accidental paint transfers. This might require you to constantly wipe your hands on a wet rag (like I had to). There's nothing worse than getting an unsightly and permanent paint smudge on your project.
Once you have entirely filled in your stensil, peel it back quickly and carefully.
Then let you pillow cover sit until the paint has had ample time to dry.

Once the paint is no longer wet, you can remove the plastic and insert your pillow form.

Then place them somewhere you can admire them often.

These pillows were super easy to make and super cheap to boot. In total I spent $24 and it only took about an hour to make all four. I love them and hope you do too.
DIY Accent Bench
I woke in a Bob Villa sorta mood today and had a hankerin' to build something. I thought about it for a little while, and after throwing around a couple of ideas, I finally settled on this:
You might remember this cute little thing from an earlier post. It's an "aged wood bench" from World Market and retails for $149. When I saw the price it felt like someone reached down my throat and puched my stomach from the inside.
I love this little bench. I really wanted this little bench. I have the perfect spot picked out for this little bench. But, there is no flippin' way I'm spending one hundred and fitty dollas on it...even if I love it almost as much as my kids.
After analyzing the picture for a while, and channeling my inner Bob, I came up with a way to recreate the look for only a couple of bucks...no seriously.
The best part...it only requires a few supplies:
* a table saw{if you don't have one, the guys at Home Depot do}
* a piece of wood {I used a leftover piece of 8x8x12 board, they retail for about $7}
* a wooden dowel{I used a cedar ballister. It cost about $2.50}
* Screws
* Wood GlueThe World Market version measures 34inches x 18inches, so I started out by cutting my board into three piecs: one at 34 inches, and two at 18 inches.
Then I dry fit my three cut pieces and measured the distance between the two legs.
Next, I found the center of each leg and measured up four inches from the bottom,
and drilled pilot holes
After that, I drilled pilot holes in the ends of my ballister and applied wood glue.
Then I screwed each of the legs to either end of the ballister.
I did the same for the top of bench. I centered the board on the legs, drilled pilot holes
applied some wood glue
then screwed it on.
When I referred back to the inspiration pic, I realized that the support dowel looked like it when through the board and protruded out the side. So, I decided to cut two, 1 1/2 inch pieces of ballister and glue them to the outsides of the legs, so that I could achieve the illusion of the wood extending all the way through the board. This wasn't a necessary step, it's purely aesthetic, but I think it adds a little somethin' somethin'. But you be the judge.
I decided to use my bench as an end table, since I didn't have one. But I think it would look super cute in the entry way, by the front door, or in a childs room. Really it would look fabulous anywhere.
I had to give my bench a good sanding. It had spray paint and spackle, and who knows what else on it since it had been sitting in the basement for a few years. You can still sorta see a little of the red spray paint, but it doesn't bother me too much. I didn't stain the wood, but I did give a nice coat of lemon wax just to help bring out the grain.
Now I realize that my little bench isn't nearly as beautiful as the World Market version, but bare in mind that it cost me under $10 to make, while the inspiration version retails for $149. So, while my bench may be a little rough around the edges...literally, I saved myself a whopping $139, so who really cares.